TL;DR: Solar pool ionizer start up is fundamentally different from traditional pool opening patience replaces chemical shock, gradual establishment replaces massive dosing, and verification replaces guesswork. This 2026 guide provides a complete, day-by-day start up protocol: initial water balancing, electrode inspection, controlled ionizer activation, copper level monitoring, and phosphate assessment. Follow this sequence exactly, and your ionic field will establish properly in 3-5 days, delivering crystal-clear, chemical-free water for the entire season.
SEO Summary: 2026 solar pool ionizer start up guide: complete step-by-step protocol for spring opening, water balancing, electrode installation, controlled activation, copper testing, and phosphate management.
Table of Contents
- The Start Up Philosophy: Patience Over Power
- Pre-Start Checklist: What to Do Before Powering On
- Initial Water Balancing: The Foundation of Success
- Electrode Inspection, Cleaning & Installation
- Days 1-2: Controlled Ionizer Activation
- Day 3: First Copper Test & Output Adjustment
- Days 4-7: Stabilization & Fine-Tuning
- Phosphate Assessment & Preventive Treatment
- Troubleshooting: When Start Up Doesn't Go as Planned
- Quick Reference: Solar Ionizer Start Up Checklist
- Conclusion & Key Takeaways
The Start Up Philosophy: Patience Over Power
Every spring, millions of pool owners repeat the same ritual: remove cover, test water, calculate chemical doses, add products, wait, retest, readjust. This traditional start up approach relies on chemical shock massive chlorine doses intended to overwhelm dormant algae and reset water chemistry in hours.
Solar pool ionizer start up requires a complete mental reset. You are not shocking your pool into submission. You are establishing a persistent ionic field that will provide continuous, gentle sanitation for the entire season. This process takes days, not hours. It requires patience, not power. It rewards careful observation, not aggressive intervention.
The difference is fundamental. Traditional start up follows a pattern of add chemicals, wait four to six hours, test, add more chemicals, and repeat until balanced. Ionizer start up follows a completely different sequence: balance water, install electrodes, activate at seventy to eighty percent output, verify copper after seventy-two hours, adjust slightly, and done.
This guide provides the complete, field-tested 2026 protocol for solar pool ionizer start up. Follow it exactly, and your ionic field will establish properly in three to five days. Rush it, skip steps, or add unnecessary chemicals, and you will extend the process to one to two weeks while potentially damaging your electrodes.
For a comprehensive understanding of how seasonal transitions affect your entire pool system, our complete seasonal maintenance schedules guide provides year-round protocols that build upon this start up foundation.
Pre-Start Checklist: What to Do Before Powering On
Before you turn on your ionizer or even install the electrodes, several critical preparation steps must be completed. Skipping these steps is the most common cause of failed start ups and premature electrode failure.
Remove and Store Winter Cover Properly
Remove the cover carefully to avoid dumping accumulated debris into the pool. Clean the cover thoroughly with mild soap and water, then allow it to dry completely before folding or rolling according to manufacturer instructions. Store it in a dry, rodent-proof location. Inspect the cover for damage and either repair it or note replacements needed before next winter.
Reconnect and Inspect All Equipment
Reconnect the pump, filter, heater, and any automation controllers. Inspect all electrical connections for corrosion, loose terminals, or rodent damage. Check the pump lid O-ring for cracking or compression set and lubricate if needed. Verify that the filter is clean and properly assembled, and record the clean pressure for reference. Ensure all valves are positioned for normal circulation.
Refill Pool to Proper Operating Level
Bring the water level to the middle of the skimmer opening or tile line. If you are using municipal water, test the fill water for pH, alkalinity, and calcium hardness. If you are using well water, test for iron, manganese, and copper these metals can cause staining when combined with ionizer output. Run the pump to verify circulation and check for leaks at all recently disturbed connections.
Gather Your Testing Equipment
Assemble copper test strips or a digital copper meter, a pH test kit using liquid DPD or a digital meter, a total alkalinity test kit, a calcium hardness test kit, and a phosphate test kit for preventive maintenance. Prepare a log book or digital tracking system to record all readings and adjustments.
Verify Solar Panel Condition and Exposure
Clean the panel surface with a soft cloth and mild soap, then rinse thoroughly. Check for physical damage from winter storms such as cracks, delamination, or broken frames. Verify the panel orientation and tilt, adjusting for optimal spring sun angle at latitude plus ten to fifteen degrees. Confirm that cable connections are secure and weatherproof. If you have a multimeter, test the panel it should produce eighteen to twenty-two volts open circuit in full sun.
Pro Tip: Create a permanent log book for your pool system. Record the date of this start up, baseline water test results, electrode installation date, and any adjustments made. This log becomes invaluable for troubleshooting and predicting future maintenance needs.
For pools that experienced significant winter algae growth or extended closure periods, our complete guide to restoring a green pool provides additional pre-start up protocols before ionizer activation.
Initial Water Balancing: The Foundation of Success
Water chemistry is the foundation upon which successful ionization is built. An ionizer cannot compensate for unbalanced water it can only maintain cleanliness once balance is achieved. Do not proceed until your water meets these parameters.
Critical Pre-Start Water Parameters
pH must be between 7.4 and 7.6, which is the ideal range for ionizer start up. Total alkalinity should be between 80 and 120 parts per million, with seventy to ninety parts per million preferred for long-term stability. Calcium hardness must be between 200 and 300 parts per million. Cyanuric acid, if present from previous chlorine use, should be below thirty parts per million ionizers do not require CYA. Free chlorine must be below one part per million, as high chlorine interferes with copper ion activity. Copper should read zero, with no residual from previous treatments.
Step-by-Step Water Balancing Protocol
Test and adjust pH first, as it is the most critical parameter for ionizer performance. If pH exceeds 7.8, add muriatic acid according to a pool calculator and retest after four to six hours of circulation. If pH is below 7.2, add sodium carbonate to raise it and retest after four to six hours. Target 7.4 to 7.6 before proceeding.
Next, test and adjust total alkalinity. Alkalinity acts as a pH buffer, and incorrect alkalinity causes pH drift. If alkalinity is below 80 parts per million, add sodium bicarbonate. Approximately 1.5 pounds per 10,000 gallons raises alkalinity by ten parts per million. If alkalinity exceeds 120 parts per million, add muriatic acid with aeration to lower it. This is a slower process and may require twenty-four to forty-eight hours. Target 80 to 120 parts per million, with seventy to ninety ideal for ionizer stability.
Test and adjust calcium hardness. If hardness is below 200 parts per million, add calcium chloride increaser following product dosing instructions. If hardness exceeds 400 parts per million, partial drain and dilution with low-hardness water is the only practical solution. Target 200 to 300 parts per million.
Address cyanuric acid if present. Ionized pools do not require CYA, and high CYA above fifty parts per million can interfere with copper activity in hybrid systems. If you plan to maintain minimal chlorine backup and CYA exceeds fifty parts per million, partial drain and dilution is required. For ionizer-only pools, CYA will naturally dilute over time and no immediate action is needed.
Finally, verify chlorine level. If free chlorine exceeds one part per million, allow the pool to circulate in sunlight without adding chemicals. Ultraviolet radiation from the sun degrades chlorine rapidly, typically reducing it to acceptable levels within twenty-four to forty-eight hours. Do not add chlorine neutralizers, as they introduce additional chemicals and may affect water balance.
Pro Tip: Use a pool water calculator app to determine exact chemical dosing. Guessing leads to over-correction, which creates chemical swings that delay start up. Calculate precisely, add in increments, and retest before adding more.
For pools with complex water chemistry challenges or historically unstable parameters, our comprehensive guide to chemistry management provides advanced troubleshooting and long-term stabilization strategies.
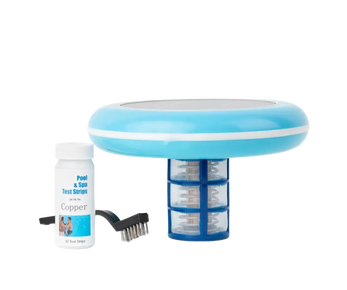
Electrode Inspection, Cleaning & Installation
The electrode cartridge is the heart of your ionizer system. Proper inspection and installation before start up ensures maximum performance and longevity. This ten-minute procedure can extend electrode life by one to two years.
For New Electrodes During First Installation
Remove the electrode cartridge from its packaging and inspect it for any visible damage that may have occurred during shipping, such as cracked housing, bent plates, or loose connections. Verify that the O-ring is properly seated and free from debris. Lightly lubricate the O-ring with silicone pool lubricant never use petroleum-based products. Insert the cartridge into the chamber until it is fully seated, then hand-tighten the retaining nut or locking ring. Do not overtighten, as O-ring compression creates the seal, not torque.
For Existing Electrodes During Seasonal Reinstallation
Remove the electrodes from winter storage and inspect them for any physical damage. Examine the electrode surfaces for scale buildup, which appears as white, crusty calcium deposits. If you find light scale that is thin and patchy, clean it with a soft nylon brush under running water. If you encounter heavy scale that forms a thick, uniform coating, use a mild acid cleaning solution. Mix one part muriatic acid with ten parts water in a plastic container, submerge the electrodes for two to five minutes until bubbling stops, then rinse thoroughly with fresh water and neutralize any acid residue with a baking soda solution.
Inspect the electrodes for erosion by comparing their thickness to new condition. If they are eroded more than fifty percent, consider replacing the cartridge before start up. Check the O-ring condition and replace it if it is cracked, flattened, or hardened. Always keep spare O-rings in your maintenance kit.
Chamber Inspection
Inspect the chamber interior for scale buildup or debris. Clean it with a bottle brush if necessary, taking care not to scratch internal surfaces. Verify flow switch operation if your system is equipped with one by gently depressing the paddle it should move freely and return to position. Check chamber O-rings and seals and replace them if damaged.
Installation Verification
Confirm that the electrodes are properly seated and that electrical connections are secure. Verify that the chamber is oriented correctly, with the flow direction arrow matching water flow. If your system is equipped with bypass valves, ensure they are positioned for flow through the chamber rather than bypass. Start the pump and verify no leaks at chamber connections. Check the flow indicator, whether it is a spinner, LED, or hand warmth, to confirm water movement through the chamber.
Pro Tip: Take a dated photograph of your electrodes before installation. Compare it to photographs from previous seasons to track erosion rates and predict replacement timing. This simple practice provides objective data for maintenance planning.
For detailed guidance on maximizing electrode life through proper care and water chemistry, our electrode cleaning and maintenance frequency guide provides specific recommendations based on water hardness and seasonal usage patterns.
Days 1-2: Controlled Ionizer Activation
The most common start up mistake is setting the ionizer to maximum output immediately, assuming that more is better. This approach does not establish the ionic field faster it wastes electrode life, risks temporary copper over-concentration, and can cause cloudiness or light staining.
Correct Activation Protocol
Set the initial output at seventy to eighty percent of maximum. For analog controllers, set the dial to approximately three-quarters of full range. For digital controllers, enter a seventy to eighty percent output setting. For smart controllers, select Spring Start Up or Initial Field Establishment mode if it is available.
Verify that the solar panel is operating correctly. The controller display should indicate power input from the solar panel. If there is no power indication, verify panel connections and sun exposure. Some controllers show real-time panel wattage or voltage record this baseline reading.
Run the pump continuously for the first twenty-four to forty-eight hours. Continuous circulation ensures even distribution of initial ions throughout the pool. Do not use timer schedules during this establishment period. For variable-speed pumps, operate at a moderate speed between 2000 and 2500 RPM for optimal ion dispersion.
Observe and document the water condition. The water should remain clear. Slight initial cloudiness may indicate existing particulates being filtered out. Note any unusual odors, colors, or surface conditions. Verify that there is no algae regrowth in areas that were cleaned during preparation.
Resist the urge to intervene chemically. Do not add chlorine, algaecides, or clarifiers during this period. Do not adjust pH unless it drifts outside the 7.2 to 7.8 range. Do not increase ionizer output above eighty percent.
When Non-Chlorine Shock Is Appropriate
If water remains noticeably cloudy after twenty-four hours of continuous circulation and filtration, one application of non-chlorine shock using potassium monopersulfate may be beneficial. This oxidizes organic contaminants without interfering with copper ion establishment. Dose according to package directions for your pool volume, add directly to the skimmer with the pump running, and continue continuous circulation. The ionizer remains operational during this treatment. Do not use chlorine-based shock products during ionizer start up.
Pro Tip: If you have a smart controller with remote monitoring, check system status periodically throughout the first two days. This establishes baseline performance data and familiarizes you with normal operating parameters.
For pools equipped with variable-speed pumps and automation, our guide to energy-efficient circulation systems provides specific pump speed recommendations for optimal ion dispersion during start up.
Day 3: First Copper Test & Output Adjustment
Approximately seventy-two hours after activation, your ionic field should be partially established. This is the first opportunity to measure copper concentration and adjust output accordingly.
Copper Testing Protocol
Collect a representative water sample using a clean sample container. Do not use containers that previously held soap or chemicals. Collect the sample elbow-deep, away from return jets and skimmers. Test immediately and do not allow the sample to sit.
Select the appropriate testing method. A digital copper meter is preferred, as it provides readings accurate to 0.01 parts per million. Insert the probe and record the reading, ensuring that you calibrate the meter per manufacturer instructions before use. Copper test strips are acceptable, with accuracy of plus or minus 0.1 parts per million. Dip the strip for the specified time and compare it to the color chart under good lighting. Liquid drop test kits are an alternative that is typically more accurate than strips but less convenient.
Interpret the results with appropriate targets. The target range at day three is 0.2 to 0.3 parts per million. Full summer target is 0.2 to 0.4 parts per million, but establishment is gradual. If copper is below 0.2 parts per million, increase output by ten percent increments every twenty-four hours until the target is reached. If copper is above 0.3 parts per million, maintain the current output full summer levels are not needed in early spring. If copper exceeds 0.5 parts per million, decrease output by twenty percent immediately and retest in twenty-four hours.
Document all results by recording the date, copper reading, output setting, and water temperature. Note any observations about water clarity, algae presence, or other factors. This data becomes your baseline for future performance comparison.
pH and Alkalinity Verification
Test pH and alkalinity concurrently with copper. PH should remain in the 7.4 to 7.6 range. Adjust if it has drifted. Alkalinity should be stable. If a significant change has occurred, investigate the cause.
Common Misconception
Many new ionizer owners expect 0.4 parts per million copper immediately. This is neither necessary nor desirable. Algae and bacteria are less active in cooler spring water, and lower copper concentrations between 0.2 and 0.3 parts per million provide adequate protection while preserving electrode life. The ionic field will strengthen naturally as water warms and days lengthen.
Pro Tip: If you are using test strips, store them properly. Heat and humidity degrade the reactive pads. Keep the container tightly sealed at room temperature. Write the date opened on the container and discard it after six months.
For comprehensive guidance on accurate copper testing and troubleshooting inconsistent readings, our complete copper test strip troubleshooting guide addresses common issues and provides solutions for obtaining reliable results.
Days 4-7: Stabilization & Fine-Tuning
During this period, your ionic field continues to strengthen and stabilize. Your role shifts from active intervention to careful observation and minor adjustments.
Daily Tasks
Perform a visual clarity check each day. The water should be progressively clearer. Give the solar panel a quick glance to ensure it remains clean and unobstructed. Verify the flow indicator to confirm water is moving through the chamber. Conduct a quick pH test to verify stability, and adjust only if pH is outside the 7.2 to 7.8 range. Confirm that the pump continues to run on its continuous circulation schedule.
Every 48 Hours
Repeat the copper test using the same method and location for consistency. Record the results and compare them to previous readings. Adjust output in five to ten percent increments if copper remains below 0.2 parts per million. If copper rises above 0.4 parts per million, reduce output by ten to fifteen percent.
Transition Planning
When copper stabilizes in the 0.2 to 0.4 parts per million range and water clarity is excellent, begin planning your transition from start up mode to normal seasonal operation. For the pump schedule, reduce from continuous operation to a normal filtration schedule. This is typically five to six hours daily for single-speed pumps and twelve to sixteen hours at low speed for variable-speed pumps. Document the output percentage that maintains target copper levels. This becomes your baseline summer setting. Transition monitoring frequency from daily copper testing to weekly verification.
Signs of Successful Start Up
Copper concentration should be stable at 0.2 to 0.4 parts per million without daily adjustment. Water should be crystal clear with no haze or cloudiness. There should be no visible algae growth on walls, floor, or waterline. No chlorine odor should be present. PH should remain stable within the 7.4 to 7.6 range.
Pro Tip: The first week after start up is the ideal time to establish your maintenance routine. Create a simple checklist and post it near your equipment. Consistency during this period builds habits that will serve you all season.
For a complete daily, weekly, and monthly maintenance framework, our optimized daily pool management checklists provide printable templates and digital tracking recommendations.
Phosphate Assessment & Preventive Treatment
Phosphates are the single most common cause of mid-season algae outbreaks in ionized pools. They enter the water through fertilizers, lawn chemicals, tap water, and even airborne dust. Algae cannot grow without phosphates, regardless of copper concentration.
Why Phosphate Assessment Belongs in Start Up
Testing and treating phosphates during start up is preventive medicine. Algae are dormant or slow-growing in cool spring water, which gives you a window to remove their food source before they become active. Once water warms and algae begin competing for nutrients, phosphate removal becomes reactive rather than preventive.
Phosphate Testing Protocol
Test for phosphates on days five through seven of start up, after the initial ionic field is established. Use a phosphate test kit specifically designed for pool water, either liquid drop or digital. The target level is below 500 parts per billion, and below 300 parts per billion is ideal for ionized pools. Levels exceeding 500 parts per billion indicate a significant algae food source, and levels above 1000 parts per billion guarantee an eventual algae outbreak.
Phosphate Treatment Protocol
If phosphates exceed 500 parts per billion, apply a phosphate remover according to the product instructions. Most phosphate removers are liquid or granular formulations. Add them to the skimmer with the pump running. After treatment, run the pump continuously for twenty-four to forty-eight hours. Filter pressure will rise as precipitated phosphates are captured. Clean or backwash the filter twenty-four to forty-eight hours after treatment. Retest to verify that phosphates have been reduced to the target range and repeat treatment if necessary.
Source Control Strategies
Rinse pool toys and floats before introducing them to the pool, as they accumulate phosphates from grass and soil. Minimize fertilizer use near the pool area and choose phosphate-free products for surrounding landscaping. Consider installing a garden hose pre-filter for pool make-up water. After heavy rain, test phosphates promptly, as storm runoff introduces significant phosphate loads.
Pro Tip: Many pool owners skip phosphate testing because their pool has never had algae. This logic fails with ionizers. Chlorine-based pools can overcome moderate phosphates with increased chlorine, but ionizers cannot. Phosphate management is not optional for ionized pools it is essential preventive maintenance.
For pools with persistent phosphate challenges despite treatment, our complete strategy for cleaner pools with solar pool ionizer includes advanced phosphate management protocols and source identification techniques.
Troubleshooting: When Start Up Doesn't Go as Planned
Even with perfect execution, start up challenges occasionally arise. This section addresses common problems and their solutions.
Copper Reading Remains Below 0.2 ppm After 5-7 Days
If copper remains low, first consider inadequate solar production. Verify that the panel is clean, properly oriented, and receiving adequate sunlight. Check for new shade from trees or structures. Consider relocating the panel or adding a second panel. Next, verify that the flow rate is neither too high nor too low. Check the flow meter reading and adjust pump speed or the bypass valve to achieve the optimal flow range of thirty to sixty gallons per minute for residential systems. Inspect the electrodes for depletion. Remove and examine them, and if they are significantly eroded, replace the cartridge. Finally, check for controller malfunction. Verify that the controller display indicates active output and test voltage at the chamber connections.
Copper Reading Exceeds 0.5 ppm After Start Up
If copper is too high, the output setting may be too high. Reduce output by twenty percent immediately and retest in twenty-four hours. You may have overestimated your pool volume. Recalculate your pool volume accurately, as you may have undersized relative to ionizer capacity. There may be existing copper from algaecides. Test for copper before start up next season and avoid copper-based algaecides. Continue reducing output until copper stabilizes at 0.2 to 0.4 parts per million. Do not drain the pool unless copper exceeds 1.0 parts per million with confirmed staining.
Persistent Cloudiness After 5-7 Days
If cloudiness persists, first consider inadequate filtration. Clean the filter and verify that pump runtime is sufficient. Test and treat phosphates, as they may be fueling fine particulate algae. Test calcium hardness and pH, and adjust them if they are out of range. If the cloudiness appears to be from accumulated organics, consider a non-chlorine shock treatment to oxidize them.
Algae Appears During or Immediately After Start Up
If algae appears, it is likely that copper never reached an effective concentration. Follow the low-copper troubleshooting procedures above. Phosphates may be extremely high, above 1000 parts per billion. Aggressively treat phosphates and consider multiple applications. If existing algae was not properly brushed before start up, brush affected areas vigorously, increase copper output temporarily, and for severe cases, consider a one-time algaecide application.
pH Constantly Rising
If pH constantly rises, test alkalinity. If it exceeds 120 parts per million, lower it using the acid and aeration method. Consider whether there is excessive aeration from waterfalls, fountains, or spillovers. Reduce their operation or adjust your pH management expectations. If you have a new plaster pool, aggressive pH management is required for the first six to twelve months. Consult your builder for specific guidance.
Pro Tip: When troubleshooting, change only one variable at a time. Adjust output, test, wait twenty-four hours, and observe. Changing multiple variables simultaneously makes it impossible to identify the actual cause and solution.
For pools experiencing copper staining concerns during or after start up, our complete copper staining prevention and remediation guide provides immediate response protocols and long-term prevention strategies.
Quick Reference: Solar Ionizer Start Up Checklist
Print this checklist and keep it near your equipment. Use it as your daily guide during the start up process.
Pre-Start
Remove, clean, and store the winter cover. Reconnect and inspect all equipment. Refill the pool to the proper operating level. Test the fill water chemistry for pH, alkalinity, calcium hardness, and metals. Clean the solar panel and verify its orientation and connections. Gather all testing equipment.
Water Balancing
Test and adjust pH to 7.4-7.6. Test and adjust total alkalinity to 80-120 parts per million. Test and adjust calcium hardness to 200-300 parts per million. Verify that free chlorine is below 1.0 part per million. Document all baseline readings.
Electrode Installation
Inspect electrodes for scale and damage. Clean them with a nylon brush or mild acid solution if necessary. Lubricate and inspect the O-ring. Install the cartridge and hand-tighten only. Verify no leaks and confirm flow indicator operation.
Activation
Set ionizer output to 70-80% of maximum. Verify solar panel power indication. Run the pump continuously for 24-48 hours. Apply non-chlorine shock only if water remains cloudy. Resist all urges to add chlorine, algaecides, or clarifiers.
Day 3
Test copper concentration using a digital meter or reliable test strips. Target 0.2-0.3 parts per million at this stage. Adjust output in 10% increments if below target. Reduce output immediately if above 0.5 parts per million. Test pH and alkalinity concurrently.
Days 4-7
Perform daily visual clarity and flow checks. Test copper every 48 hours. Adjust output in 5-10% increments as needed. Test phosphates and treat if above 500 parts per billion. Plan transition to normal seasonal schedule.
Pro Tip: Laminate this checklist and keep it at your equipment pad. Use a dry-erase marker to check off completed tasks and record readings directly on the laminated sheet. This creates an immediate visual record of your start up progress.
Conclusion & Key Takeaways
Solar pool ionizer start up is not difficult, but it is different. It requires patience over power, observation over intervention, and systematic verification over guesswork. The sequence is logical: balance water chemistry first, install and inspect electrodes carefully, activate at conservative output levels, verify copper concentration methodically, adjust incrementally, and assess phosphates preventively.
Pool owners who master this start up protocol enjoy entire swimming seasons with crystal-clear water, zero chemical handling, and minimal daily maintenance. Those who rush the process, skip verification steps, or revert to chemical-thinking habits often struggle with inconsistent copper levels, unexpected algae outbreaks, and premature electrode replacement.
The choice is yours. The technology is proven. The protocol is established. Success depends entirely on execution.
Key Takeaways
- Patience is the most important ingredient: Ionic field establishment takes 3-5 days, not 3-5 hours. Do not rush the process or override it with unnecessary chemicals.
- Water chemistry must be balanced before activation: pH of 7.4-7.6, alkalinity of 80-120 ppm, calcium hardness of 200-300 ppm. The ionizer maintains cleanliness but cannot correct imbalance.
- Electrode inspection and cleaning extends life by 1-2 years: Remove, inspect, clean if scaled, verify O-ring condition. Ten minutes of preventive care saves electrode replacement costs.
- Start at 70-80% output, not maximum: Higher output does not establish the ionic field faster. It wastes electrode life and risks copper over-concentration.
- Test copper at 72 hours, not earlier: The ionic field needs time to develop. Testing too early leads to unnecessary output increases.
- Target 0.2-0.3 ppm at day 3, not 0.4 ppm: Full summer levels are not needed in cool spring water. Lower targets preserve electrode life.
- Phosphate testing is preventive medicine: Test and treat phosphates during start up. Waiting until algae appears guarantees a harder battle.
- Document everything: Record copper readings, output settings, water chemistry, and observations. Data enables optimization and early problem detection.
- When troubleshooting, change one variable at a time: Adjust, wait, observe, document. Multiple simultaneous changes obscure cause and effect.
A successful solar pool ionizer start up is the foundation of an entire season of effortless, chemical-free pool enjoyment. Follow this guide step by step, trust the process, and resist the urge to intervene chemically. Your reward will be the clearest, silkiest, most natural-feeling water you have ever experienced with less than sixty seconds of daily maintenance.
For pool owners transitioning from traditional sanitation, our complete chemical-free pool maintenance guide provides the broader context for year-round success after a proper start up.