TL;DR: After shocking your pool, wait for chlorine levels to drop below 3 ppm before restarting your solar ionizer to prevent chemical interference. Run the pump continuously for 24 hours to circulate the shock, then test and rebalance pH and alkalinity. Once water is balanced, restart the ionizer and monitor copper levels to re-establish the protective ionic field for clear, algae-free water.
SEO Summary: Learn the correct steps to restart your solar pool ionizer after shocking your pool. This guide covers timing, water rebalancing, reactivation, and monitoring to ensure effective sanitization.
Table of Contents
- Understanding the Chlorine-Ionizer Interaction
- Step 1: Wait for Chlorine Levels to Drop
- Step 2: Circulate & Rebalance Your Water Chemistry
- Step 3: Restart & Optimize Your Solar Ionizer
- Step 4: Monitor & Maintain the Ionic Field
- Pro Tips for Different Shock Types & Situations
- Common Mistakes to Avoid
- Conclusion & Key Takeaways
Understanding the Chlorine-Ionizer Interaction
Shock treatments whether chlorine-based or non-chlorine (potassium monopersulfate) are powerful oxidizing agents designed to rapidly break down contaminants, clear cloudy water, or prevent pool algae and removal with solar pool ionizer. Your solar ionizer, however, works through a completely different process, releasing copper and silver ions that provide continuous, residual sanitation.
The problem arises because high levels of chlorine (above 3-5 ppm) can oxidize and "lock up" the copper ions, rendering them ineffective. This chemical reaction can also cause the copper to precipitate out of the water, potentially leading to temporary cloudiness or, in worst-case scenarios, light staining. Therefore, restarting your ionizer too soon after shocking can waste energy, reduce electrode life, and fail to protect your pool.
Step 1: Wait for Chlorine Levels to Drop
Patience is the most critical step. Do not turn your solar pool ionizer back on immediately after shocking.
The Safe Threshold:
- For Chlorine-Based Shock (Calcium Hypochlorite, Sodium Dichlor): You must wait until the free chlorine (FC) level drops to 3.0 ppm or below. This can take 24-48 hours with proper circulation and sunlight, depending on the shock dose and pool size.
- For Non-Chlorine Shock (Potassium Monopersulfate - MPS): While MPS doesn't directly affect copper ions as aggressively, it's still best practice to wait 12-24 hours for it to fully oxidize contaminants before restarting the ionizer. Test for the absence of oxidizer if your test kit allows.
Action: After adding shock, run your pool pump on high speed continuously. Use a FAS-DPD drop test kit (not test strips) for accurate chlorine readings. Test every 8-12 hours until you reach the safe level.
Step 2: Circulate & Rebalance Your Water Chemistry
Before reactivating the ionizer, your pool's foundational chemistry must be stable. Shock treatments can significantly alter pH and alkalinity.
Post-Shock Rebalancing Protocol:
- Test Full Chemistry: Once chlorine is at or below 3 ppm, test for:
- pH: Target 7.2 - 7.6. Shock often raises pH.
- Total Alkalinity (TA): Target 80 - 120 ppm. Low TA leads to pH bounce.
- Calcium Hardness (CH): Target 200 - 400 ppm.
- Adjust as Needed:
- If pH is high (>7.8), lower it using muriatic acid. This is crucial, as high pH reduces ionizer effectiveness.
- Raise low alkalinity with baking soda (sodium bicarbonate).
- Brush and Vacuum: Brush the pool walls and floor to loosen any dead algae or debris, then vacuum to waste if possible. This removes organic material the shock oxidized, lightening the load on your soon-to-be-restarted ionizer.
Step 3: Restart & Optimize Your Solar Ionizer
With balanced water, you can safely restart your system.
Reactivating the System:
- Power On: Ensure the solar panel is in sunlight and turn the ionizer unit on. If it has a variable output control, set it to the manufacturer's recommended setting for your pool volume (often a mid-range setting).
- Verify Operation: Check that the system indicator shows it's receiving solar power and actively producing ions. Listen for a slight hum or look for tiny bubbles at the chamber outlet if visible.
- Initial "Boost" Cycle (Optional but Recommended): Some advanced models have a "boost" or "super chlorinate" mode. If yours does, run this cycle for 24-48 hours to help re-establish the ionic field more quickly. If not, simply running it at its standard setting is fine.
Step 4: Monitor & Maintain the Ionic Field
The ionizer's protection isn't instantaneous. It takes time to build an effective concentration.
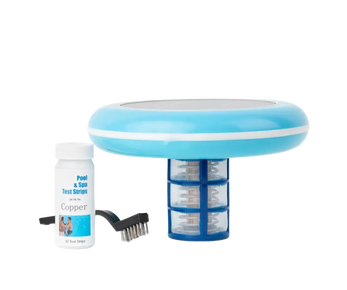
- Test for Copper Ions: 24-48 hours after restarting, use a copper test strip or liquid test kit. Your target range is typically 0.2 - 0.4 ppm (check your manual).
- Adjust Output if Needed: If copper levels are below 0.2 ppm after two days, slightly increase the ionizer's output dial. If above 0.5 ppm, decrease it to prevent potential staining.
- Resume Normal Maintenance: Once copper levels are stable in the target range, you can return your pump to its normal filtration schedule. Your ionizer is now the primary sanitizer again.
Pro Tips for Different Shock Types & Situations
- After an Algae Bloom: If you shocked to kill algae, phosphates (algae food) are now high. Having smarter pool sanitation helps. After restarting the ionizer, test for phosphates. If >500 ppb, use a phosphate remover to prevent rapid algae return and help your ionizer work efficiently.
- Preventative "Mini-Shock": In a well-maintained ionized pool, you rarely need shock. Instead, consider a monthly or bi-monthly dose of non-chlorine shock (MPS) on a sunny afternoon. Wait 12 hours, then ensure the ionizer is running. This oxidizes organics without disrupting the ionic field for long.
- For Hybrid Systems (Ionizer + Salt Generator): If you have a hybrid system, turn both systems off before shocking. Restart the ionizer first once chlorine is low. Then, turn the salt generator back on, setting it to a very low output (e.g., 10-20%) to handle oxidation while the ionizer handles sanitation.
Common Mistakes to Avoid
- Restarting Too Early: The #1 mistake. High chlorine neutralizes copper ions, wasting energy and leaving your pool unprotected.
- Ignoring pH: Failing to rebalance pH after shock forces the ionizer to work in a non-optimal range, reducing its efficacy.
- Forgetting to Clean the Filter: Shock causes debris to clump. A dirty filter restricts flow, which can drastically reduce ion dispersion. Clean your filter after the shock process.
- Using Copper-Based Algaecides with Ionizers: Never add supplemental copper algaecides. Combined with your ionizer, this can lead to copper levels soaring above 0.5 ppm and causing stains.
Conclusion & Key Takeaways
Properly restarting your solar pool ionizer after shocking is a simple but precise process that ensures both systems work in harmony, not against each other. By waiting for chlorine to drop, rebalancing your water, and methodically reactivating the ionizer, you protect your investment and ensure a swift return to crystal-clear, comfortably sanitized pool water.
Key Takeaways
- Wait for Low Chlorine: Never restart your ionizer until free chlorine is at or below 3.0 ppm. Use a reliable test kit.
- Rebalance First: Always test and adjust pH and alkalinity to ideal ranges before turning the ionizer back on.
- Verify & Monitor: Confirm the ionizer is operating and test for copper ions within 48 hours to ensure the protective field is established (0.2-0.4 ppm).
- Clean the System: Brush, vacuum, and backwash/clean your filter after shocking to remove contaminants and ensure proper water flow for ionization.
- Prevent Future Shocks: A well-maintained solar ionizer pool rarely needs shocking. Keep phosphates low and the ionic field stable to prevent algae.
- Know Your Shock Type: Non-chlorine shock (MPS) allows for a quicker ionizer restart (12-24 hours) than chlorine-based shock (24-48+ hours).
Following this protocol maximizes the efficiency and longevity of both your shock treatment and your solar ionizer, keeping your pool water perfectly balanced with minimal effort.