Saltwater pools are popular for their softer water feel, reduced chlorine smell, and improved swimmer comfort. However, while they require fewer chemical adjustments than traditional chlorine pools, saltwater pools still need consistent cleaning and proper maintenance to stay healthy and efficient.
TL;DR understanding how to clean and maintain a saltwater pool correctly helps prevent algae growth, equipment damage, and costly repairs. In this guide, we'll walk through the essential steps and best practices for keeping your saltwater pool clean, balanced, and running smoothly year-round.
Whether you're a new saltwater pool owner or looking to refine your maintenance routine, this comprehensive guide will provide you with the knowledge and strategies needed to keep your pool in pristine condition throughout every season.
Table of Contents
- How Saltwater Pools Work
- Daily and Weekly Cleaning Tasks
- Maintaining Proper Water Chemistry
- Caring for the Salt Chlorine Generator
- Preventing Algae and Scale Buildup
- Seasonal Maintenance Tips for Saltwater Pools
- Final Thoughts: Keeping Your Saltwater Pool in Top Condition
1. How Saltwater Pools Work
A saltwater pool is not actually chlorine-free; it's a smart system that makes its own chlorine on demand. The key difference from traditional pools is automation instead of manually adding chlorine tablets or liquid, you maintain a specific salt concentration, and a device called a salt chlorine generator (SCG) continuously converts that salt into the chlorine needed to keep your pool clean. This section will walk you through exactly how this process works, why it's beneficial, and what you need to do to keep it running smoothly.
The Four Core Components
Before diving into the process, it's important to know the key pieces of pool equipment that make your saltwater pool function:
- The Salt Chlorine Generator (SCG): This is the main control unit, usually installed in your pool equipment pad after the filter and heater. It houses the electronic controls and power supply.
- The Electrolysis Cell (or Salt Cell): This is the chamber where the magic happens. It contains parallel plates made of rare metals like titanium coated with ruthenium or iridium. Water flows through this cell, and when electricity is applied, chlorine is created.
- The Control Panel: This allows you to set the percentage of chlorine output (typically 0-100%), displays error codes, and shows salt levels and cell status. Many modern systems offer smartphone app control.
- The Flow Sensor: A safety device that prevents the generator from operating when water isn't flowing, which could damage the cell or create unsafe chlorine gas buildup.
Step-by-Step: How Salt Becomes Chlorine in Your Pool
Follow these six sequential steps to understand exactly how your saltwater pool creates and maintains sanitation:
- Add the Right Salt: You begin by adding pool-grade salt (sodium chloride that's at least 99.8% pure) to your water. Unlike table salt, pool salt has no iodine or anti-caking agents. For a typical 15,000-gallon pool, you'll add about 375-525 pounds initially to reach 3,000-4,000 ppm concentration.
- Dissolution and Circulation: The salt dissolves completely within 24 hours with the pump running. Your pool water now contains dissolved salt ions (Na+ and Cl-) circulating throughout the system. This salinity is about 1/10th that of ocean water barely noticeable when swimming.
- Water Enters the Salt Cell: As your pool pump runs, saltwater flows through the plumbing and into the salt cell chamber. The cell contains a series of metal plates with opposite electrical charges.
- Electrolysis Occurs: When the control panel is set to produce chlorine, it sends a low-voltage DC current (typically 20-35 volts) through the cell. This electrical charge causes a chemical reaction called electrolysis.
- Immediate Sanitizer Formation: The chlorine gas produced in the cell doesn't stay as gas for long it immediately dissolves in the water flowing past to form hypochlorous acid (HOCl). This is the actual sanitizing agent that kills bacteria, viruses, and algae in your pool.
- The Regeneration Cycle: Here's the beautiful part of the system: after hypochlorous acid sanitizes your pool, it doesn't disappear. It breaks down naturally from sunlight and organic contaminants, but instead of vanishing completely, it reverts back to salt (NaCl). This salt then circulates back through the system to be converted again creating a continuous, efficient recycling process.
Five Critical Operating Parameters You Must Monitor
For your saltwater system to work properly, these five factors must be carefully balanced:
- Salt Concentration (3,000-4,500 ppm): This is the fuel for your system. Below 2,500 ppm, chlorine production drops significantly. Above 6,000 ppm can damage equipment and irritate swimmers. Test weekly with test strips or a digital meter.
- Chlorine Output Setting (20-80% typical): This percentage controls how much chlorine your generator makes. You adjust this based on:
1. Pool usage (more swimmers = higher setting)
2. Temperature (warmer water = higher setting)
3. Sunlight exposure (more sun = higher setting due to UV degradation)
4. Weather conditions (rain, wind bringing debris) - Pump Runtime (8-12 hours daily): Your generator only produces chlorine when water is flowing through it. Calculate runtime by dividing your pool's volume by your pump's flow rate to ensure at least one complete turnover per day.
- Water Temperature (above 60°F/15°C): Most salt chlorine generators have a minimum temperature sensor because electrolysis becomes inefficient in cold water. In winter, you may need supplemental chlorine.
- Water Chemistry Balance: Three factors dramatically affect chlorine efficiency:
1. pH (7.2-7.6 ideal): High pH makes chlorine less effective
2. Cyanuric Acid (30-50 ppm): Protects chlorine from UV degradation
3. Calcium Hardness (200-400 ppm): Prevents corrosion or scaling
Common Misconceptions About Saltwater Pools
Many new saltwater pool owners have incorrect assumptions. Let's clarify the most common ones:
- "Saltwater pools are chlorine-free": False. They use chlorine just like traditional pools they just make it automatically from salt.
- "Saltwater is easier to maintain": Partially true. You don't handle chlorine chemicals, but you must monitor salt levels, clean the cell, and balance water chemistry just as diligently.
- "Saltwater won't damage my equipment": False. While modern equipment is salt-resistant, high salt concentrations or improper water balance can still cause corrosion faster than in freshwater pools.
- "I can taste the salt": Barely noticeable. At 3,000 ppm, salt concentration is about 1/10th of seawater. You might notice a slight taste if you get water in your mouth, but it's not like swimming in the ocean.
Understanding exactly how your saltwater pool system works is the foundation for all maintenance that follows. When you know the science behind the sanitation, troubleshooting problems, adjusting settings, and performing maintenance becomes logical rather than guesswork. This knowledge supports effective pool algae prevention, helping you prevent problems before they occur and ensuring your pool remains clean, clear, and comfortable throughout the swimming season.

2. Daily and Weekly Cleaning Tasks
Maintaining a crystal-clear pool water isn't just about appearances it's a critical component of system efficiency and water quality. Debris in your pool consumes chlorine as it breaks down, forcing your salt chlorine generator to work harder and potentially leaving insufficient sanitizer for actual bacteria and algae control. Regular cleaning prevents this unnecessary chlorine demand while keeping your water sparkling clear. This section details exactly what to do daily and weekly to maintain optimal pool conditions.
- Daily cleaning prevents chlorine depletion and maintains system efficiency
- Weekly cleaning removes settled debris and prevents algae colonization
- Proper cleaning extends the life of your salt chlorine generator
- Consistent cleaning reduces overall chemical usage and costs
- Clean pools require less pump runtime, saving energy
Why Cleaning Matters for Your Saltwater System
Every leaf, insect, or speck of dirt that enters your pool represents organic material that your chlorine must break down. When your chlorine is busy oxidizing debris, it's not available to sanitize the water. For saltwater pools, this is particularly important because your chlorine production happens at a steady rate. Unlike traditional pools where you can simply add more chlorine tablets, your generator produces chlorine continuously based on your settings. If debris is consuming that chlorine faster than it's being produced, you'll develop sanitation issues. Regular cleaning reduces this chlorine demand, allowing your system to maintain proper sanitizer levels with less strain on the equipment.
- Organic debris competes with bacteria for available chlorine
- Saltwater generators produce chlorine at a fixed rate, making debris management critical
- Clean pools maintain more stable chlorine levels
- Reduced debris means less strain on filtration systems
- Proper cleaning prevents chlorine lock-up from organic contaminants
Daily Cleaning Tasks: The 10-Minute Morning Routine
Perform these three essential tasks every single day during swimming season. This daily routine takes only 5-10 minutes but prevents major problems later. First, using a telescoping pole with a leaf skimmer attachment, remove all visible debris from the water surface. Start at one end of the pool and work methodically to the other, paying special attention to corners and behind ladders where debris collects. This prevents leaves from sinking and staining your pool floor. Second, check your water level it should be at the midpoint of your skimmer opening. If too low, add water with a garden hose until it reaches the proper level. If too high, use your backwash setting to lower it slightly. Proper water level ensures optimal skimmer function. Third, walk around your equipment pad and listen to your pump. It should run smoothly without unusual noises. Check that water is flowing strongly from your return jets. Verify that your salt chlorine generator's display shows normal operation without error codes. These quick daily checks catch problems early when they're easier and cheaper to fix.
- Skim surface debris daily to prevent sinking and staining
- Maintain proper water level at skimmer midpoint
- Listen for unusual pump noises indicating potential problems
- Check return jet flow strength and consistency
- Monitor salt chlorine generator display for error codes
- Inspect equipment pad for leaks or unusual conditions
Weekly Cleaning Tasks
Once a week, dedicate 30-45 minutes to these thorough cleaning tasks. Begin by brushing every surface of your pool walls, floor, steps, and corners. Use a nylon brush for vinyl or fiberglass pools, and a stainless steel brush for concrete or plaster surfaces. Brush from the waterline down to the floor, using overlapping strokes. This dislodges microscopic algae before it can establish colonies and breaks up scale formation on tiles and surfaces. Next, vacuum your entire pool floor. If you have an automatic cleaner, ensure it's running properly and hasn't missed any areas. For manual vacuuming, connect your vacuum head to the telescoping pole and vacuum hose, prime the hose completely by submerging it to remove all air bubbles, then connect it to your skimmer suction port. Move slowly across the pool floor in overlapping passes, covering every square foot. After vacuuming, turn off your pump and clean all baskets. Remove leaves and debris from your pool skimmer baskets, emptying them into a trash bag rather than on the ground where debris can blow back into the pool. Open your pump strainer basket and remove any collected debris, checking for small objects that might indicate a larger problem. Rinse all baskets with a garden hose, ensuring water flows freely through all openings. Finally, backwash your filter if you have a sand or DE filter according to your pressure gauge readings. For cartridge filters, rinse with a hose when pressure rises 8-10 psi above clean pressure.
- Brush all pool surfaces weekly to prevent algae attachment
- Vacuum the entire pool floor to remove settled debris
- Clean skimmer baskets and pump strainer baskets thoroughly
- Backwash or rinse filters according to pressure readings
- Inspect automatic cleaners for proper coverage and function
- Check vacuum equipment for leaks or connection issues
Monthly Deep Cleaning Tasks
While not strictly weekly, these monthly tasks complement your regular cleaning. First, inspect your salt cell for calcium buildup. With the system off, remove the cell from its housing and look through the plates. If you see white crusty deposits covering more than 25% of the plates, clean it with a diluted muriatic acid solution (4 parts water to 1 part acid) or a commercial cell cleaner. Second, check your pool's tile line for scale buildup. Use a tile brush or pumice stone designed for pools to remove any mineral deposits. Third, lubricate all o-rings and gaskets on pump lids, filter closures, and valve handles with silicone-based pool lubricant to prevent drying and cracking. Fourth, test all your pool's safety equipment ensure ladders are secure, handrails are tight, and your safety rope is in good condition.
- Inspect and clean salt cell for calcium scale monthly
- Remove scale buildup from tile lines and waterline
- Lubricate all o-rings and gaskets with silicone lubricant
- Test and secure all safety equipment and fixtures
- Inspect pool lights and light niches for debris
- Check automatic cleaner parts for wear and tear
Troubleshooting Common Cleaning Problems
Even with regular cleaning, you may encounter issues. If you notice your skimmer isn't pulling debris effectively, check that weir doors move freely and that water level is correct. If vacuum suction seems weak, check for clogs in your hose or skimmer line. If brushing reveals persistent algae spots despite adequate chlorine, you may need to adjust your chlorine output higher or brush more frequently. If leaves stain your pool floor because you missed a day of skimming, use a stain treatment specifically designed for organic stains. Remember that cleaning frequency should increase during fall when leaves drop heavily, during spring pollen season, and after storms or high winds that bring extra debris.
- Weak skimmer suction indicates clogged lines or improper water level
- Poor vacuum performance suggests hose clogs or pump issues
- Persistent algae spots require increased brushing and chlorine output
- Organic stains need specialized stain treatments for removal
- Seasonal changes demand adjusted cleaning frequencies
- Storm debris requires immediate attention to prevent problems
The Connection Between Cleaning and Water Chemistry
Your cleaning routine directly impacts your water chemistry. Organic debris consumes chlorine and affects pH levels. After heavy cleaning or vacuuming your pool, test your water and adjust chemicals as needed. When you backwash your filter, you're removing water from the system remember to account for this when calculating chemical additions. Clean pool surfaces mean chemicals work more efficiently, requiring less adjustment overall. Most importantly, a clean pool reduces strain on every component of your saltwater system from the pump working against less resistance to the generator not needing to produce extra chlorine to combat debris. This comprehensive cleaning approach ensures your saltwater pool remains not just clean to look at, but truly sanitized and efficient in operation.
- Organic debris consumption affects chlorine and pH balance
- Backwashing removes water, requiring chemical recalculation
- Clean surfaces improve chemical distribution and effectiveness
- Reduced debris lowers strain on pumps and filters
- Efficient cleaning minimizes salt chlorine generator workload
- Proper maintenance reduces overall chemical consumption and costs
By integrating these daily, weekly, and monthly cleaning tasks into a consistent routine, you transform pool maintenance from a burdensome chore into a simple, manageable process. This proactive approach not only preserves the beauty and clarity of your saltwater pool but also ensures the long-term health and efficiency of your entire system, protecting your investment and maximizing your enjoyment season after season.

3. Maintaining Proper Water Chemistry
Understanding pool water chemistry in a saltwater pool is a delicate balancing act where every parameter affects the others. Unlike traditional pools where you primarily focus on chlorine and pH, saltwater systems require attention to additional factors that directly impact chlorine production and equipment longevity. Proper water chemistry is not just about clean water it's about protecting your investment in pool surfaces, equipment, and the salt chlorine generator itself. This comprehensive guide will walk you through exactly what to test, why each parameter matters, and how to make precise adjustments that keep your pool water perfectly balanced.
The Core Philosophy
Saltwater pools present unique chemical challenges that traditional chlorine pools don't face. The electrolysis process that creates chlorine also affects water chemistry in specific ways. The salt cell generates chlorine at a specific pH level, and as a byproduct, it creates sodium hydroxide which raises pH. This means saltwater pools naturally trend toward higher pH levels, requiring more frequent acid additions. Additionally, the high salinity and electrical current in the cell can accelerate corrosion if water chemistry isn't properly balanced. Every chemical parameter interconnects imbalanced pH reduces chlorine effectiveness, improper calcium hardness damages surfaces, and incorrect alkalinity causes pH swings. Understanding these relationships is key to maintaining a healthy saltwater pool.
The Five Critical Parameters and Their Ideal Ranges
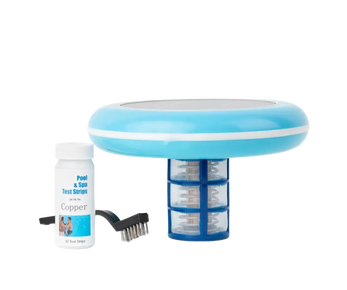
Master these five measurements to maintain perfect water chemistry. First, salt concentration must remain between 3,000 and 4,500 parts per million for optimal chlorine production. Test weekly with salt test strips or a digital meter, adding pool-grade salt only when levels drop below 3,000 ppm. Second, free chlorine should maintain 1-3 parts per million. Test daily during peak season, understanding that your salt generator produces chlorine continuously, so levels should remain stable if properly set. Third, pH must stay between 7.2 and 7.6. Test two to three times weekly, adding muriatic acid as needed to counteract the natural pH rise from the generator. Fourth, total alkalinity acts as pH's buffer, ideally between 80-120 ppm. Test weekly, adjusting with sodium bicarbonate to raise or muriatic acid to lower. Fifth, calcium hardness protects surfaces and should be 200-400 ppm for most pools. Test monthly, adjusting with calcium chloride or partially draining and refilling if too high.
Step-by-Step Testing Procedure for Accurate Results
When using a pool test kit, follow this exact sequence every time you test your water to ensure accuracy. Begin by collecting a water sample from elbow depth, away from return jets and skimmers. Use a clean container dipped into the water not one exposed to air or contaminants and test immediately for the most accurate results. If using test strips, dip completely for the specified time and compare colors immediately in natural light. For liquid pool test kits, add reagents drop by drop, shaking between drops as instructed, and compare against the provided color standards. Always test free chlorine and pH first, followed by total alkalinity and calcium hardness. Test salt concentration separately using salt-specific strips or a digital meter. Record all results in a logbook or app, noting the date, weather conditions, pool usage, and any chemical additions. This historical data helps identify patterns and predict future needs.
The Adjustment Process
When adjustments are needed, follow this methodical approach to avoid overcorrection. Always address alkalinity first if it's outside the 80-120 ppm range, as it stabilizes pH. To raise alkalinity, add sodium bicarbonate (baking soda) at a rate of 1.5 pounds per 10,000 gallons to increase by 10 ppm. Broadcast over the deep end with the pump running. To lower alkalinity, add muriatic acid in small increments, waiting 4-6 hours between additions. Next, adjust pH using muriatic acid to lower or soda ash to raise. Add acid diluted in a bucket of water, pouring slowly in front of a return jet. Wait at least 4 hours before retesting. For calcium hardness adjustments, use calcium chloride to increase, adding according to package directions based on your pool volume. To decrease calcium hardness, partial water replacement is necessary drain and replace 20-25% of your water with fresh, low-calcium water. Finally, adjust salt levels only when they drop below 3,000 ppm, adding no more than the amount needed to reach 3,500 ppm to avoid overshooting.
The Salt Chlorine Generator's Impact on Water Chemistry
Your generator directly influences water chemistry in ways that require specific management. The electrolysis process naturally raises pH through sodium hydroxide production, meaning you'll add acid more frequently than in traditional pools. Monitor this by testing pH two to three times weekly and maintaining a supply of muriatic acid. The generator also affects chlorine stability while it produces consistent chlorine, that chlorine remains vulnerable to UV degradation. Maintain cyanuric acid (stabilizer) between 30-50 ppm to protect chlorine from sunlight. However, avoid levels above 80 ppm as this can reduce chlorine effectiveness. The generator's efficiency depends on water temperature below 60°F, chlorine production decreases significantly, requiring supplemental chlorine during cooler months. Also, high calcium levels cause scaling on the cell plates, reducing efficiency and requiring more frequent cleaning. Keep calcium hardness in check to protect your equipment.
Seasonal Chemistry Adjustments and Special Considerations
Water chemistry needs change with seasons and conditions, making regular use of a pool test kit essential. During summer’s peak swimming season, test chlorine and pH daily due to increased usage, sunlight, and temperature, using your pool test kit to guide adjustments. You’ll likely need to increase your generator’s output percentage and add acid more frequently. In spring opening, use a pool test kit to balance all parameters before starting your generator, paying special attention to salt levels that may have diluted over winter. During fall, gradually reduce generator output as temperatures drop and usage decreases, but continue testing with your pool test kit to maintain sanitation as organic debris increases. When closing for winter, fully balance water chemistry with a pool test kit before adding winterizing chemicals. Special situations require extra testing: after heavy rain, use your pool test kit to rebalance all parameters as rainwater dilutes chemicals and affects pH. After heavy pool parties or storms that bring debris, shock with a non-chlorine oxidizer to help your generator catch up. When adding fresh water to replace evaporation, remember that it contains no cyanuric acid, so test and adjust stabilizer levels accordingly.
Troubleshooting Common Water Chemistry Problems
Even with diligent maintenance, problems arise. If chlorine levels remain low despite adequate generator output, check salt concentration first, then test cyanuric acid levels low stabilizer allows UV degradation. If pH constantly rises despite frequent acid additions, check total alkalinity if too high, it buffers pH upward. Scale formation on tiles or equipment indicates high calcium hardness, high pH, or both test and adjust both parameters. Cloudy water despite adequate chlorine suggests improper filtration, high total dissolved solids, or imbalanced chemistry test all parameters and consider a clarifier. Corrosion of metal fittings or ladder parts indicates low pH or low alkalinity test and raise both gradually. If your generator indicates low salt but tests show adequate levels, the sensor may need cleaning or the cell may be failing. When any parameter proves difficult to balance, consider having a professional water analysis done to identify hidden issues like phosphates or metals.
The Preventive Approach: Regular Maintenance Schedule
Establish this testing and adjustment schedule to prevent problems before they start. Test free chlorine and pH two to three times weekly, adjusting as needed. Test total alkalinity weekly, making small adjustments to keep it stable. Test salt concentration weekly using salt-specific strips. Test calcium hardness and cyanuric acid monthly. Test total dissolved solids quarterly when TDS reaches 1,500 ppm above your initial fill water, consider partial water replacement. Every six months, have your water professionally tested to verify your home testing accuracy and catch any subtle imbalances. Keep detailed records of all tests, adjustments, and observations this historical data becomes invaluable for troubleshooting and understanding your pool's unique patterns. By maintaining this disciplined approach to water chemistry, you ensure your saltwater pool remains not just swimmable, but optimally balanced for equipment protection, swimmer comfort, and efficient operation of your salt chlorine generation system.

4. Caring for the Salt Chlorine Generator
The salt chlorine generator is the technological heart of your saltwater pool a sophisticated device that transforms simple salt into powerful sanitizer through electrolysis. Unlike traditional pool equipment that merely moves or filters water, the generator actively creates chemicals through precise electrical processes. This complex function demands specific, informed care. Proper pool maintenance of your generator isn't just about cleaning; it's about understanding its operation, recognizing early warning signs, and implementing preventive practices that extend its lifespan from the typical 3-5 years to potentially 7 years or more while ensuring consistent, reliable chlorine production throughout its service life.
Understanding Generator Anatomy
To properly care for your generator, you need to understand its components and their functions. The system consists of three main parts working in harmony. The control panel is the brain, housing the microprocessor that regulates voltage, monitors salt levels via sensors, displays operational status, and communicates error codes. This panel requires protection from moisture and direct sunlight, with occasional inspection of connections and display clarity. The flow switch acts as the safety monitor, preventing operation without water flow to avoid dangerous chlorine gas buildup and cell damage. This switch must move freely and be checked monthly for proper function. The electrolytic cell is the workhorse where chemical transformation occurs, containing titanium plates coated with precious metals like ruthenium or iridium that facilitate electrolysis. These plates gradually wear down over years of use, and their efficiency depends on being kept free of mineral scale and debris. Understanding these components helps you troubleshoot issues and perform targeted maintenance.
The Monthly Inspection Routine
Establish a consistent monthly inspection routine that takes just 15 minutes but prevents major issues. Begin with the control panel while the system is running. Check that all displays are clear and readable, with no fading or missing segments. Verify the salt reading matches your pool test strips results within 200-300 ppm. Note the chlorine production percentage setting and ensure it hasn't been accidentally changed. Listen for unusual sounds a quiet hum is normal, but buzzing or clicking indicates problems. Next, inspect the cell visually without removing it. Look through the clear housing or inspection port if available. You should see the metal plates with some space between them. If you cannot see through to the other side due to white, crusty deposits, cleaning is needed. Check for any green coloration indicating copper from corroded heat exchangers or blue indicating cobalt from certain algaecides both require immediate attention. Finally, examine all plumbing connections for leaks, especially around the cell housing where seals can degrade. Look for salt creep white crystalline deposits on fittings indicating minor leaks that evaporate and leave salt behind.
The Art of Cell Cleaning: When, How, and What to Avoid
Cell cleaning is the most critical maintenance task, done improperly it can destroy your cell, done correctly it extends its life. Clean only when necessary typically every 3-6 months depending on your water hardness not on a fixed schedule. Necessity is determined by visible scale covering approximately 25% of plate surface or reduced chlorine production despite proper settings. To clean, first turn off all power to the pool system at the breaker. Remove the cell according to manufacturer instructions, usually by loosening unions on both ends. Inspect the plates carefully heavy scaling appears as thick white crust, light scaling as a cloudy film. Prepare a cleaning solution of one part muriatic acid to four parts water in a plastic bucket, always adding acid to water never water to acid. Submerge only the metal plates, not the entire cell or end caps. Soak for 3-5 minutes until bubbling stops, indicating scale has dissolved. Never exceed 10 minutes as acid damages the precious metal coatings. Rinse thoroughly with fresh water. Some manufacturers recommend vinegar for light cleaning use this alternative if concerned about acid strength. Never use abrasive tools, brushes, or picks on the plates as this removes the catalytic coating. After cleaning, inspect plates for pitting or uneven wear indicating replacement may be needed soon.
Seasonal Operation and Adjustment Strategies
Your generator's operation needs change with seasons, requiring different care approaches. During peak summer months, run the generator 8-12 hours daily at 40-80% output depending on pool usage and temperature. Monitor chlorine levels weekly and adjust output percentage gradually never more than 10% change at a time. In shoulder seasons (spring and fall), reduce runtime to 4-8 hours and output to 20-40% as lower temperatures and reduced swimming decrease chlorine demand. During winter in freezing climates, properly winterize the system by removing the cell, cleaning it thoroughly, drying completely, and storing indoors. For milder climates where the pool remains open, run the system 2-4 hours daily at minimal output just to prevent stagnation. Always maintain water circulation whenever the generator operates, even at minimal settings. When reopening in spring, install the cell, check all connections, and start at low output (20%) for the first 48 hours while testing water chemistry frequently. This gradual approach prevents shock to the system and allows you to dial in the perfect setting for current conditions.
Troubleshooting Common Generator Issues
Even well-maintained generators encounter problems requiring specific troubleshooting. If the unit displays "low salt" but tests show adequate levels, the sensor may be dirty or failing. Clean the sensor contacts with a soft cloth and vinegar solution. If "high salt" appears with normal test results, the cell may be scaled or the sensor malfunctioning clean the cell first, then check connections. Reduced chlorine output despite proper settings indicates either scaling, a failing cell, or incorrect water balance. Clean the cell, test water chemistry completely, and if problems persist, the cell may need replacement after 3-5 years of use. If the unit won't power on, check the breaker, GFCI protection, and power supply before assuming unit failure. Erratic readings or display issues often indicate board problems requiring professional service. Flow errors usually mean a clogged pump basket, closed valve, or failing flow switch check water flow first, then the switch mechanism. Always consult your manufacturer's manual for error code specifics before attempting repairs.
Maximizing Generator Lifespan Through Preventive Practices
Extend your generator's life beyond typical expectations with these preventive practices. First, maintain perfect water chemistry high calcium hardness causes scaling, low pH corrodes components, improper salt levels strain the system. Second, ensure adequate water flow undersized pumps or clogged filters force the generator to work harder. Third, protect from power surges with a dedicated surge protector for pool equipment. Fourth, avoid chemical shocks never add chlorine tablets through skimmers as concentrated chlorine damages cells, and limit use of copper-based algaecides that plate onto cell surfaces. Fifth, during extreme heat waves, provide shade for the control panel to prevent overheating. Sixth, keep detailed maintenance records including cleaning dates, water chemistry before and after cleaning, and performance observations. This history helps identify patterns and predict replacement needs. Seventh, consider installing a secondary filter before the cell if you have high sediment or debris issues. Finally, have a professional inspection annually to catch issues you might miss many service companies offer generator-specific checkups that can add years to your unit's life.
The Replacement Decision
Despite excellent care, all generators eventually need replacement. Recognize these signs that replacement is approaching. The most obvious is reduced chlorine production even after cleaning and with perfect and balanced pool water. If you're running at 100% output just to maintain minimum chlorine levels, the cell is likely failing. Visible plate damage pitting, erosion, or missing coating sections indicates the end of useful life. Frequent error codes that persist after troubleshooting suggest electronic failure in the control panel. Age is a factor most cells last 3-5 years, premium models 5-7 years with excellent care. When replacing, consider upgrading to a newer model with better technology, self-cleaning features, or smartphone connectivity. Always replace with manufacturer-recommended cells to ensure compatibility. Properly recycle old cells as they contain precious metals many manufacturers offer recycling programs. Time the replacement for early spring to maximize the first season with your new cell. With proper care throughout its life and timely replacement when needed, your salt chlorine generator will provide years of reliable, efficient chlorine production that makes saltwater pool ownership both enjoyable and economical.

5. Preventing Algae and Scale Buildup
Algae and scale represent the two most persistent enemies of any saltwater pool owner and are the primary causes of green, cloudy water that pool owners often struggle to fix. While these problems affect all pools, saltwater systems face unique vulnerabilities: the constant electrolysis process can accelerate scale formation on equipment, and the consistent but lower chlorine output requires precise balance to prevent algae outbreaks. Understanding that algae is a biological invader while scale is a chemical deposit is essential to fixing green pool water and developing effective prevention strategies. This comprehensive guide explains how to create an environment where neither can gain a foothold helping you fix green pool water, avoid costly treatments and equipment damage, and maintain clear, inviting water all season long.
Understanding Your Enemies
To effectively prevent problems, you must first understand what you're fighting. Algae comes in several forms, each with different prevention needs. Green algae is the most common, appearing as a green tint, cloudy water, or slimy patches on surfaces. Mustard algae resembles sand or dirt stains, typically in shaded areas, and is chlorine-resistant. Black algae forms deep-rooted spots in plaster surfaces, appearing as black or blue-green spots. Pink algae is actually a bacterium that forms in corners and behind lights. Scale, meanwhile, comes in three main varieties. Calcium carbonate scale appears as white, crusty deposits on tiles, equipment, and the salt cell. Calcium silicate scale forms as a hard, glass-like coating that's extremely difficult to remove. Metallic scale from copper or iron appears as green or brown stains. Each type requires specific prevention approaches, making accurate identification the first step in your defense strategy.
The Four Pillars of Algae Prevention
Preventing algae requires maintaining four critical conditions simultaneously, creating an environment where algae cannot survive. First, maintain consistent sanitizer levels by keeping free chlorine between 1-3 ppm at all times. Test daily during peak season, understanding that algae can begin growing when chlorine drops below 1 ppm for just a few hours. Adjust your salt generator output to match conditions increase during hot weather, heavy use, or after rains. Second, ensure perfect water circulation to eliminate dead spots where algae thrives. Run your pump 8-12 hours daily, adjusting return jets to create a circular flow pattern. Use pool brushes weekly to disturb potential algae attachment points, paying special attention to corners, behind ladders, and steps. Third, maintain proper water balance with pH between 7.2-7.6 and alkalinity 80-120 ppm, as unbalanced water reduces chlorine effectiveness. Fourth, practice regular physical cleaning skim debris daily, vacuum weekly, and clean filters when pressure rises 8-10 psi above normal. Organic debris provides nutrients for algae, so removing it starves potential colonies before they can establish.
The Science of Scale Prevention
Scale forms when water becomes supersaturated with minerals that precipitate out and deposit on surfaces. Prevention focuses on maintaining water chemistry that keeps minerals in solution. The key measurement is the Langelier Saturation Index, a calculated value that predicts scaling potential. To calculate, you need pH, temperature, calcium hardness, alkalinity, and total dissolved solids. Aim for an LSI between -0.3 and +0.3 to prevent both scale and corrosion. Specifically, manage calcium hardness between 200-400 ppm higher in plaster pools, lower in vinyl or fiberglass. Control pH meticulously, as higher pH dramatically increases scaling potential. Maintain total alkalinity as a buffer against pH swings. Monitor total dissolved solids and consider partial water replacement when TDS exceeds 1,500 ppm above fill water. Use scale prevention products containing phosphonates or polymers that sequester calcium ions, keeping them in solution. These specialized chemicals work by surrounding calcium molecules, preventing them from bonding together to form scale. Apply according to manufacturer directions, typically monthly during high-evaporation seasons.
Targeted Prevention for High-Risk Areas
Certain pool areas require extra attention due to their vulnerability. The salt cell itself is a prime scale location because electrolysis increases pH locally at the plates. Inspect monthly and clean only when scale covers 25% of plate surface to avoid unnecessary acid exposure. Waterline tiles accumulate scale from evaporation brush weekly with a tile brush and use a pumice stone or scale remover for stubborn deposits. Heaters and heat exchangers are especially vulnerable maintain proper water flow and consider installing a sacrificial anode if your heater is prone to scaling. Return jets and eyeballs can develop scale that restricts flow remove and clean quarterly. Light niches and behind light fixtures trap water with minimal circulation remove and clean behind lights during seasonal maintenance. Ladder rails and steps in shaded areas often develop scale or algae brush these areas twice weekly. Automatic pool cleaner hoses and parts accumulate mineral deposits soak in descaling solution monthly. By targeting these high-risk areas with extra prevention measures, you stop problems before they become visible throughout the pool.
Seasonal Prevention Adjustments
Your prevention strategy must adapt to seasonal changes that affect both algae growth and scale formation. During summer's peak heat, increase chlorine output to combat faster algae growth in warm water, and monitor calcium concentration more frequently as evaporation concentrates minerals. Run your pump longer up to 12 hours daily to maintain circulation in frequently used water. In spring, focus on establishing perfect balance before algae season begins, shocking the pool with a non-chlorine oxidizer to eliminate winter buildup. During fall, maintain prevention even as temperatures drop, as decaying organic matter provides algae nutrients. When closing for winter, balance water chemistry perfectly and use a winter algaecide specifically formulated for cold water. In year-round warm climates, maintain consistent prevention year-round with particular attention during rainy seasons when dilution affects chemical balance. Adjust your salt generator's output percentage gradually with seasonal changes don't make sudden large adjustments that create conditions for problems.
Early Detection: Recognizing Warning Signs
Catching problems early makes prevention easier and less costly. For algae, watch for these early indicators: water that loses its sparkle or develops a slight haze, surfaces that feel slippery or slimy, increased chlorine demand without explanation, or visible dust-like particles suspended in water. Test for phosphates occasionally, as levels above 100 ppb indicate potential algae food sources. For scale, early signs include: a gritty feel on pool surfaces, reduced water flow from return jets, salt generator showing reduced efficiency, or a white film on waterline tiles that won't brush off easily. Use a scaling test strip monthly to measure calcium saturation levels. If you notice any warning signs, immediately test all water parameters, clean filters, brush all surfaces vigorously, and adjust chemistry as needed. Early intervention often prevents full-blown outbreaks that require aggressive chemical treatments.
Integrating Prevention into Your Maintenance Routine
Effective prevention isn't separate from regular maintenance it's integrated into every task. When you test chlorine and pH daily, you're preventing algae. When you brush walls weekly, you're preventing algae attachment. When you clean your salt cell only when needed, you're preventing unnecessary acid damage. When you maintain proper calcium levels, you're preventing scale. When you run your pump adequate hours, you're preventing stagnation where algae grows. Create a checklist that includes all prevention measures: daily sanitizer checks, weekly brushing of all surfaces, monthly inspection of high-risk areas, quarterly cleaning of return jets and equipment, seasonal adjustment of chemical parameters, and annual professional inspection of equipment for early scale detection. Keep detailed records of all maintenance, noting any close calls or early warning signs. This systematic approach transforms prevention from a reaction to problems into a proactive lifestyle that keeps your saltwater pool consistently clear, comfortable, and problem-free throughout every swimming season.

6. Seasonal Maintenance Tips for Saltwater Pools
Saltwater pools require different care strategies as temperatures, weather patterns, and usage levels change throughout the year. Unlike traditional pools, where seasonal adjustments primarily involve opening and closing, saltwater systems and solar pool ionizers demand ongoing attention to accommodate the unique needs of salt chlorine generators, varying water chemistry requirements, and equipment protection across different climates. This comprehensive seasonal guide provides detailed month-by-month strategies for maintaining your saltwater pool’s performance, efficiency, and longevity, ensuring both your pool and solar pool ionizer operate at their best regardless of your geographic location or local weather patterns.
Spring Opening: The Foundation for a Successful Season
Spring opening sets the stage for your entire swimming season and requires meticulous attention to detail. Begin by removing your winter cover carefully, preventing debris from entering the water. Use a submersible pump to remove standing water from the cover before removal. Once uncovered, inspect the pool structure for any winter damage, checking for cracks, tile loss, or surface staining. Reinstall all equipment that was stored for winter, including ladders, diving boards, and safety equipment. Clean the filter thoroughly backwash sand or DE filters, or remove and hose clean cartridge filters. Reinstall the salt cell, ensuring all connections are tight and O-rings are lubricated with silicone-based lubricant. Fill the pool to the proper level, typically the midpoint of the skimmer opening. Test all water parameters before starting your salt chlorine generator. The ideal starting chemistry includes pH 7.2-7.4, alkalinity 80-100 ppm, calcium hardness 200-300 ppm, and salt concentration 3,000-3,500 ppm. Adjust as needed, remembering to wait 24 hours between major chemical additions. Start your pump and filter system, checking for proper flow and priming. Once water chemistry is balanced, start your salt chlorine generator at a low setting (20-30%) and gradually increase over several days as you test chlorine levels. Brush all surfaces vigorously to remove any winter film, vacuum thoroughly, and run the filter continuously for the first 48-72 hours to clear any cloudiness. This careful spring preparation prevents problems throughout the season.
Early Summer Transition: Ramping Up for Peak Usage
As temperatures rise and swimming frequency increases, adjust your maintenance routine accordingly. Increase pump runtime from 8 to 10-12 hours daily to accommodate higher usage and warmer water temperatures. Adjust your salt chlorine generator output upward by 10-20% increments weekly until you maintain 1-3 ppm chlorine consistently. Monitor chlorine consumption patterns on hot, sunny days with heavy use, you may need temporary boosts. Test water chemistry twice weekly during early summer, paying particular attention to pH that tends to rise in saltwater pools. Increase skimming frequency to daily, as summer brings more insects, pollen, and airborne debris. Establish a consistent brushing schedule of twice weekly to prevent early algae formation. Check salt levels monthly, as splash-out and backwashing reduce salt concentration. Increase calcium hardness monitoring if you experience significant evaporation. Clean your filter when pressure rises 8-10 psi above clean pressure, which may occur more frequently with increased debris. Apply sunscreen protection to your equipment control panels to prevent sun damage and overheating. Create a shaded area for pool chemicals if stored outdoors. These early summer adjustments prepare your system for the heaviest use months ahead.
Peak Summer Maintenance
During the hottest months when pools see maximum usage, implement these intensive maintenance practices. Test chlorine and pH levels daily, as high temperatures accelerate chlorine degradation and pH fluctuations. Maintain salt chlorine generator output at 50-80% depending on usage, adjusting in 5% increments based on daily test results. Run your pump during daylight hours when UV degradation is highest, typically 10-12 hours daily. Increase brushing to every other day, focusing on areas with poor circulation like corners, behind ladders, and steps. Skim surface debris multiple times daily if needed, especially after storms or windy days. Check salt levels every two weeks, as evaporation concentrates minerals but splash-out and backwashing remove salt. Monitor calcium hardness closely if you experience significant water loss to evaporation partial refills with soft water can help maintain balance. Clean your salt cell every 4-6 weeks during peak summer, as higher calcium saturation and pH fluctuations accelerate scaling. Use a non-chlorine oxidizer weekly to help your generator handle increased bather load and organic contaminants. Maintain water level consistently at the skimmer midpoint, adding water in early morning or evening to minimize temperature shock to the system. Keep a log of chemical usage and adjustments to identify patterns for future seasons. This rigorous summer maintenance ensures your saltwater pool remains crystal clear despite heavy use.
Fall Transition: Preparing for Changing Conditions
As temperatures cool and swimming frequency decreases, gradually reduce maintenance intensity while maintaining water quality. Begin reducing pump runtime by one hour weekly until reaching 6-8 hours daily. Decrease salt chlorine generator output by 10% increments weekly as chlorine demand decreases with cooler water and reduced usage. Test water chemistry weekly rather than daily, but maintain the same parameter ranges. Increase attention to organic debris as trees shed leaves skim daily and consider using a leaf cover overnight. Brush surfaces weekly rather than multiple times weekly. Check and clean skimmer baskets more frequently as leaf volume increases. Monitor water temperature when it consistently drops below 60°F, salt chlorine generators become less efficient. At this point, you may need to supplement with traditional chlorine until you close the pool. Test salt levels monthly but anticipate less fluctuation as evaporation decreases. Clean your filter thoroughly before the final closing to remove accumulated debris from the season. Inspect all equipment for wear or damage while still accessible. Begin planning for winter based on your local climate partial closing in mild climates or full winterizing in freezing regions. This gradual fall transition prevents shock to the system while accommodating changing conditions.
Mild Climate Winter Operation
In regions without freezing temperatures, many saltwater pool owners maintain year-round operation with adjusted practices. Reduce pump runtime to 4-6 hours daily, typically during daylight hours. Lower salt chlorine generator output to 20-40% depending on water temperature and occasional use. Test water chemistry every two weeks, maintaining all parameters within normal ranges. Run your heater if desired, understanding that heating increases scale potential monitor calcium saturation more closely. Clean the pool surface weekly as debris continues even in winter. Brush surfaces every two weeks to prevent algae in cooler water where chlorine is less effective. Run your automatic cleaner weekly to maintain cleanliness. Monitor water temperature below 60°F, consider supplemental chlorine as generator efficiency decreases. Protect equipment from occasional frost by covering control panels and ensuring proper drainage around equipment pads. Maintain water level despite reduced evaporation. Consider using a solar cover to retain heat and reduce debris. If the pool won't be used for extended periods, you can reduce maintenance further but never completely stop circulation. This mild climate approach keeps your pool ready for spontaneous use while conserving energy and chemicals.
Freezing Climate Winterization
In regions with freezing temperatures, proper winterization protects your investment during months of non-use. Begin by thoroughly cleaning the pool vacuum, brush all surfaces, and clean the filter. Balance water chemistry perfectly, aiming for pH 7.4-7.6, alkalinity 80-120 ppm, and chlorine at normal levels. Shocking the pool with chlorine shock 24-48 hours before closing. Lower the water level below the skimmer and return lines, typically 4-6 inches below the skimmer opening. Remove the salt cell, clean it thoroughly with appropriate solution, dry completely, and store indoors in its original box if possible. Drain all equipment including pump, filter, heater, and plumbing lines. Use a wet-dry vacuum to blow out plumbing lines, ensuring all water is removed to prevent freezing damage. Add pool antifreeze to skimmer lines, return lines, and other plumbing as recommended by your manufacturer. Install winterizing plugs in return jets and skimmer openings. Remove all accessories including ladders, rails, and diving boards clean and store properly. Cover the pool with a quality winter cover secured with water bags or other anchoring systems. Store all removable equipment in a dry, protected location. Document everything you've done for reference in spring. Consider having a professional perform the initial winterization if you're uncertain, then maintain the proper approach in subsequent years. This comprehensive winterization prevents thousands of dollars in potential freeze damage.
Climate-Specific Considerations and Special Situations
Different climates require tailored approaches beyond basic seasonal patterns. In desert climates with extreme heat and evaporation, run pumps at night to avoid peak electrical rates and reduce evaporation loss. Monitor calcium hardness constantly as evaporation concentrates minerals rapidly. Use solar covers during non-use hours to reduce evaporation by 90%. In humid subtropical climates, increase attention to algae prevention year-round and maintain higher chlorine levels during rainy seasons when dilution occurs. In coastal areas, protect metal components from salt air corrosion with additional protective coatings and more frequent inspections. In areas with hard water, implement aggressive scale prevention year-round and consider installing a water softener for fill water. During extreme weather events like heat waves, tropical storms, or cold snaps, take special precautions. Before heat waves, increase generator output preemptively and ensure equipment has adequate shade. Before storms, super-chlorinate the pool, remove loose items, and run the pump continuously during the event if safe. During unexpected cold snaps in traditionally mild areas, temporarily increase pump runtime to prevent surface freezing and protect exposed pipes with insulation. By understanding your specific climate challenges and adjusting these seasonal guidelines accordingly, you create a maintenance plan that protects your saltwater pool investment regardless of local conditions.

7. Final Thoughts: Keeping Your Saltwater Pool in Top Condition
Saltwater pools offer a comfortable and low-chemical swimming experience, but they still require consistent cleaning and maintenance. Understanding that saltwater systems are not maintenance-free but rather maintenance-different is crucial to long-term success and enjoyment.
Key takeaways:
- Clean regularly to prevent debris and algae
- Monitor water chemistry to protect equipment
- Maintain the salt chlorine generator properly
- Adjust care routines seasonally
The true beauty of saltwater pool ownership lies in the synergy of proper maintenance practices. When cleaning, chemistry monitoring, generator care, and seasonal adjustments work together, they create a system of automated pool management that practically maintains itself. This harmonious approach transforms what could feel like constant work into a simple, predictable routine that takes just minutes a day while saving hours of troubleshooting and hundreds of dollars in repairs.
With the right approach, cleaning and maintaining a saltwater pool becomes simple, cost-effective, and rewarding allowing you to enjoy clear, comfortable water throughout the swimming season.