Maintaining an ion-stabilized pool represents a fundamental shift from traditional chemical-based pool care, offering a more natural, gentle approach to water sanitation while significantly reducing maintenance time and chemical costs. Unlike conventional chlorine pools that require constant chemical balancing and monitoring, ion-stabilized pools utilize the natural sanitizing power of copper and silver ions to keep water clean, clear, and safe for swimming. This comprehensive guide covers every aspect of maintaining your ion-stabilized pool, from daily monitoring to seasonal adjustments, ensuring you maximize the benefits of this innovative pool care technology while minimizing the traditional hassles of pool ownership.
Understanding the unique maintenance requirements of ion-stabilized pools is crucial for achieving optimal results. While these systems dramatically reduce the need for traditional chemicals, they introduce new considerations for water balance, pool equipment care, and monitoring protocols. This guide will walk you through the complete maintenance ecosystem of ion-stabilized pools, providing detailed procedures, troubleshooting tips, and best practices developed through years of practical experience with this revolutionary pool sanitation method.
Table Of Contents
- Understanding Ion-Stabilized Pool Fundamentals
- Daily Maintenance Routines and Monitoring
- Weekly Maintenance and Water Testing Protocols
- Monthly Maintenance and System Optimization
- Seasonal Adjustments and Climate Considerations
- Ionizer Equipment Maintenance and Care
- Troubleshooting Common Ion Pool Issues
1. Understanding Ion-Stabilized Pool Fundamentals
Before diving into pool maintenance procedures, it's essential to understand how ion-stabilized pools differ fundamentally from traditional chlorinated pools, not just in their chemical composition but in their entire operational philosophy and maintenance requirements. In an ion-stabilized system, copper and silver ions serve as the primary sanitizing agents, working through the well-documented oligodynamic effect a phenomenon where minute amounts of metal ions exert a lethal effect on pathogenic microorganisms. This process occurs at the cellular level, where positively charged copper and silver ions are attracted to negatively charged microbial cell walls. Once attached, these ions penetrate the cell membranes and disrupt critical enzymatic processes, effectively destroying algae, bacteria, viruses, and other microorganisms by interfering with their metabolic functions and reproductive capabilities.
Unlike chlorine, which rapidly degrades when exposed to sunlight, bather waste, and organic contaminants, metal ions remain active in the water for extended periods typically several days to weeks depending on environmental conditions. This persistent protection creates a more stable sanitizing environment that doesn't experience the dramatic fluctuations common in traditional pools. The system typically maintains copper ion concentrations between 0.2-0.5 parts per million (ppm) and silver ions around 0.005-0.01 ppm, concentrations that have been scientifically proven highly effective against a broad spectrum of pathogens while remaining completely safe for swimmers, aquatic life, and the environment. These trace mineral levels are significantly below World Health Organization safety guidelines and represent concentrations similar to those found naturally in many mineral springs and drinking water sources worldwide.
The Science Behind Ion Stabilization:
- Electrochemical Attraction: Positively charged metal ions are naturally drawn to negatively charged microbial cell walls through electrostatic forces, ensuring targeted delivery to contaminants
- Cellular Penetration: Metal ions breach cell membranes and accumulate within microorganisms, disrupting essential life processes at multiple levels simultaneously
- Enzyme Disruption: Ions bind to sulfur-containing amino acids in vital enzymes, deactivating them and halting metabolic processes necessary for microbial survival
- DNA Interference: Metal ions interact with microbial DNA and RNA, preventing replication and stopping the spread of contamination at the genetic level
- Residual Protection: Unlike chlorine that degrades quickly, metal ions maintain their sanitizing power for extended periods, providing continuous protection
The maintenance philosophy for ion-stabilized pools represents a paradigm shift from the constant chemical adjustment required by traditional systems to a more nuanced approach focused on system monitoring and optimization. Rather than frequently adding chemicals to combat contaminants as they appear, you're maintaining an environment where naturally occurring ions provide continuous, proactive protection. This approach requires understanding the complex relationship between ion levels, water balance parameters, filtration efficiency, and environmental factors that collectively affect system performance. Proper maintenance ensures these elements work in perfect harmony, creating crystal-clear pool water sanitary with minimal chemical intervention while eliminating the harsh side effects associated with traditional pool sanitation methods.
Philosophical Shift in Pool Maintenance Approach:
- From Reactive to Proactive: Traditional pools require constant reaction to changing conditions, while ion-stabilized systems maintain consistent protection through continuous ion release
- Chemical Management vs. System Optimization: Focus shifts from managing chemical levels to optimizing the entire water treatment ecosystem
- Prevention Over Correction: Ion systems prevent problems before they occur rather than correcting them after they develop
- Holistic Water Management: Considers the interrelationship between ions, minerals, pH, and environmental factors as a complete system
Comprehensive Key Differences from Traditional Pool Maintenance:
- Sanitizer Persistence and Stability: Copper ions remain biologically active for days or weeks versus chlorine's hours-long effectiveness, creating a more stable sanitizing environment that doesn't experience the dramatic fluctuations common in traditional pools. This extended activity period means protection continues even during equipment downtime, power outages, or periods of heavy use that would overwhelm chlorine-based systems.
- Chemical Usage Reduction and Simplification: 80-90% reduction in traditional chemical usage while maintaining superior pool water chemistry, eliminating the need for frequent purchases, storage, and handling of multiple chemical products. This simplification extends beyond just chlorine reduction to include decreased need for algaecides, clarifiers, and balancing chemicals that traditional pools require to compensate for chlorine's limitations.
- Maintenance Frequency and Complexity: Less frequent but more specific maintenance requirements focused on system monitoring rather than chemical adjustment. While traditional pools demand near-daily attention to chemical levels, ion-stabilized pools require weekly monitoring with specific attention to ion production equipment, water balance parameters, and filtration efficiency.
- Water Quality and Swimmer Experience: Noticeably softer, more natural-feeling water without chemical odors, eye irritation, or the dry, itchy skin associated with traditional pools. The water maintains a crystal-clear sparkle without the artificial blue tint created by copper-based algaecides in traditional systems, and swimwear, hair, and skin aren't damaged by harsh oxidizers.
- Environmental Impact and Sustainability: Significantly reduced chemical runoff, manufacturing footprint, and transportation impact compared to traditional pool chemicals. The minimal ion concentrations used are environmentally benign, and solar-powered ionization systems operate with zero carbon emissions, representing a truly sustainable approach to pool sanitation.
- Equipment Longevity and Protection: Reduced corrosion and degradation of pool equipment, surfaces, and accessories due to the elimination of harsh oxidizers and the maintenance of more stable water chemistry. Heaters, pumps, filters, and liners all experience extended service life in properly maintained ion-stabilized pools.
- Health and Safety Considerations: Elimination of chlorine-related health concerns including respiratory issues, skin sensitivities, and the formation of harmful disinfection byproducts like chloramines and trihalomethanes that are associated with various health risks in traditional pools.
Understanding these fundamental differences is crucial for successful maintenance of an ion-stabilized pool. The approach requires thinking differently about water care, moving from a chemical-intensive model to an ecosystem management perspective where balance, monitoring, and prevention take precedence over reaction and correction. This philosophical shift, combined with the scientific principles of metal ion sanitation, creates a pool maintenance experience that is simultaneously more effective, more enjoyable, and more environmentally responsible than traditional methods.

2. Daily Maintenance Routines and Monitoring
Daily maintenance of an ion-stabilized pool focuses on visual inspection and basic system verification rather than the chemical testing and constant adjustment required by traditional chlorinated pools. This fundamental shift in approach represents one of the primary benefits of ionization technology replacing labor-intensive chemical management with simple observational checks and preventive measures. The daily routine should become a quick, habitual process that takes no more than 5-10 minutes but provides crucial ongoing assessment of your pool's health and the ionization system's performance.
Begin each day with a comprehensive visual assessment of your pool water conducted under natural lighting conditions. Examine the water from multiple angles, looking for the characteristic crystal clarity and vibrant sparkle that indicates proper ionization. Check for any signs of pool water cloudiness, haze, or discoloration that might suggest developing water balance issues or insufficient ion levels. Look closely at the pool walls and floor for any early signs of algae formation, which typically begins as slight discoloration or slippery surfaces before becoming visible growth. Observe the water's surface for oil slicks, foam, or unusual films that could indicate high bather load or insufficient oxidation. This visual assessment serves as your first line of defense, allowing you to detect potential problems long before they become serious issues requiring intensive treatment.
Detailed Visual Assessment Protocol:
- Clarity and Transparency Evaluation: Look straight down into the deep end you should clearly see the main drain cover and any pattern details. View across the pool length the water should appear transparent rather than hazy or milky. Check for consistent clarity from shallow to deep areas variations might indicate circulation issues.
- Surface Quality Inspection: Examine the water surface under sunlight for natural sparkle and light reflection dull surfaces may indicate developing problems. Look for oil slicks around skimmer areas or steps these often come from sunscreen and body oils. Check for foam or bubbles that persist longer than a few minutes this can signal high organic load or water chemistry imbalance.
- Structural Surface Examination: Run your hand along pool walls and steps they should feel smooth, not slimy or gritty. Look closely at corners, behind ladders, and in shaded areas where problems typically first appear. Check for any visible particles suspended in the water or settled on the bottom these indicate filtration issues.
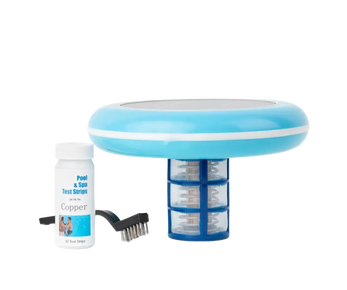
Next, conduct a thorough inspection of your ionization equipment. For floating solar ionizers, verify that the unit is moving freely around the pool and hasn't become trapped against walls, caught in ladders, or lodged in corners where water circulation is limited. Check that the ionizer maintains proper orientation with the solar panel facing upward at the correct angle to maximize sun exposure throughout the day. Examine the unit for any visible physical damage, including cracks in the housing, damaged protective screens, or signs of impact. For systems with performance indicators, verify that normal operation lights or displays are functioning correctly. If your system includes remote monitoring, check the app or control panel for any alerts or unusual readings. Remember that even partial shading of solar panels can reduce ion production efficiency by up to 30%, so ensure the unit isn't spending extended periods in shaded areas.
Ionizer Equipment Verification Checklist:
- Position and Movement Assessment: Confirm the ionizer moves freely around the entire pool rather than circulating in one area. Verify it isn't trapped in corners, against steps, or in stagnant areas where water movement is limited. Ensure it maintains appropriate distance from skimmers and returns to prevent suction or deflection.
- Orientation and Exposure Verification: Check that solar panels face upward at the proper angle (typically 15-30 degrees from horizontal). Ensure the unit isn't inverted, tilted excessively, or riding unusually low in the water. Verify that the panel receives direct sunlight during peak hours (10 AM to 4 PM) without significant shading.
- Physical Condition Inspection: Look for cracks, fractures, or impact damage to the housing and components. Check protective screens for tears, clogging, or deformation that could restrict water flow. Verify that all components are securely attached and show no signs of loosening or wear.
Skim the pool surface thoroughly to remove leaves, insects, pollen, and other organic debris that can consume ions and reduce system efficiency. This simple daily task is significantly more important in ion-stabilized pools than in traditional systems because organic debris provides food sources for microorganisms that the ions must work harder to control. Each leaf, insect, or piece of organic matter that remains in the pool represents a potential breeding ground for bacteria and algae that will deplete your ion reserve. Use a leaf skimmer with a fine mesh net to capture both large debris and smaller particles like pollen and dust that can cloud water and provide nutrients for microbial growth. Pay special attention to corners, behind ladders, and along the waterline where debris tends to accumulate.
Advanced Surface Maintenance Techniques:
- Comprehensive Skimming Protocol: Use a figure-eight motion across the entire pool surface rather than random skimming patterns. Pay extra attention to downwind areas where debris naturally accumulates. Skim both before and after peak swimming times to maintain optimal water quality.
- Debris Management: Remove large leaves and debris immediately to prevent them from sinking and decomposing. Use fine mesh nets for pollen and dust removal during high season. Empty skimmer baskets daily to maintain optimal water flow and filtration efficiency.
- Preventive Measures: Trim overhanging trees and vegetation to reduce debris introduction. Use pool covers during periods of high debris (fall leaf drop, spring pollen season). Consider surface cleaning systems for larger pools or heavy debris environments.
Verify that your circulation system is operating according to your established schedule, typically 8-12 hours daily depending on pool size, usage patterns, and environmental conditions. Proper circulation is absolutely essential for distributing ions throughout the pool and ensuring all areas receive adequate sanitization. Check that water is moving visibly across the surface and that return jets are properly adjusted to create effective circulation patterns. Listen for unusual noises from the pump that might indicate developing problems. Ensure skimmer weirs are moving freely and not obstructed by debris. Make a quick visual check of the pump pool strainer basket and clear any visible debris. This daily circulation verification ensures that the ions produced by your system are effectively distributed to every part of the pool, preventing dead spots where algae and bacteria could establish colonies.
Circulation System Daily Verification:
- Pump Operation Check: Listen for normal operating sounds unusual noises may indicate air intrusion or impeller issues. Verify pump prime and water flow air bubbles in the pump basket might signal leaks. Check pressure gauge readings significant changes may indicate filter issues.
- Return Jet Assessment: Ensure all return jets are properly aligned to create circular water movement. Verify adequate flow from each jet reduced flow might indicate blockages. Adjust jet direction seasonally based on sun exposure and usage patterns.
- Skimmer Operation Verification: Check that skimmer weirs move freely and create proper surface draw. Ensure pool skimmer baskets are empty and properly seated. Verify equal water flow between multiple skimmers in larger pools.
Comprehensive Daily Maintenance Checklist:
- Visual Water Assessment: Check for crystal clarity, vibrant surface sparkle, and absence of cloudiness or visible algae growth; examine water from multiple angles under natural light; verify no discoloration, haze, or surface films; inspect walls and floor for early problem signs
- Ionizer Verification: Confirm proper flotation, orientation, and freedom of movement; ensure no physical damage or obstruction; verify solar panel exposure and cleanliness; check for normal operation indicators; ensure proper distance from pool features
- Surface Skimming: Remove leaves, insects, pollen, and other organic debris that can consume ions and harbor microorganisms; use proper skimming techniques for complete coverage; empty skimmer baskets; address debris accumulation areas specifically
- Circulation Check: Verify proper pump operation and water movement; ensure return jets are properly adjusted for optimal distribution; listen for unusual equipment noises; confirm adequate surface movement and flow patterns
- Equipment Inspection: Quick visual check of pump, filter, and other equipment for proper operation and any signs of issues; verify timer settings and operation schedules; check for leaks, unusual vibrations, or performance changes
- Documentation and Tracking: Make mental or written notes of any changes in water appearance or equipment operation; track weather conditions and bather load that might affect performance; establish baseline observations for comparison
By implementing this comprehensive daily maintenance routine, you establish a proactive approach to pool care that prevents most problems before they develop into serious issues. This daily investment of 5-10 minutes not only ensures optimal performance of your ion-stabilized pool but also dramatically reduces the need for more intensive weekly pool maintenance and chemical interventions. The consistent attention to visual cues and system verification creates a maintenance rhythm that quickly becomes second nature while providing the ongoing monitoring necessary to keep your pool in perfect condition with minimal effort.

3. Weekly Maintenance and Water Testing Protocols
Weekly maintenance forms the cornerstone of ion-stabilized pool care, combining thorough cleaning with comprehensive water testing and system verification. This weekly ritual represents the most critical maintenance interval for ion-stabilized pools, bridging the gap between daily visual inspections and monthly comprehensive servicing. Unlike traditional pools that often require near-daily chemical adjustments, ion-stabilized systems benefit from a consistent weekly routine that addresses all aspects of water quality, equipment performance, and preventive maintenance in a single, efficient session typically requiring 60-90 minutes.
Begin your weekly maintenance by conducting comprehensive water testing using a high-quality test kit specifically designed for ionized pools or one that includes metal ion testing capabilities. For the most accurate results, collect water samples from multiple locations near the surface, from mid-depth, and close to pool return jets to account for any potential stratification or distribution variations. Test copper ion levels first, as this represents the primary sanitizing agent in your system, ensuring concentrations remain between 0.2-0.5 ppm for optimal sanitization. Levels below 0.2 ppm may allow algae and bacteria to establish footholds, while concentrations above 0.5 ppm, while still safe, represent inefficient use of your ionization system and may potentially lead to minor surface staining in pools with specific plaster finishes or very high calcium hardness.
Advanced Water Testing Procedures:
- Copper Ion Analysis: Use fresh test strips for pool with current expiration dates or liquid test kits with precise color comparators; test at the same time each week for consistency; if using test strips, dip quickly and read immediately at the specified time interval; for liquid tests, ensure proper reagent drop size and thorough mixing between additions
- Silver Ion Verification: If your system utilizes both metals, test silver ion levels maintaining 0.005-0.01 ppm; silver provides complementary protection against certain bacteria and viruses that copper may not address as effectively; consider monthly testing for silver if using combination systems to conserve test supplies
- pH Precision Testing: Check pH levels maintaining between 7.2-7.6 to optimize ion effectiveness and prevent scale formation; test pH at the same time daily since levels fluctuate throughout the day; remember that pH significantly affects copper ion solubility and effectiveness lower pH increases solubility but can cause equipment corrosion, while higher pH reduces scaling but decreases ion effectiveness
- Comprehensive Balance Parameters: Test total alkalinity (80-120 ppm) to provide pH stability and buffer against rapid chemical changes; check calcium hardness (200-400 ppm) to ensure proper water balance that supports ion stability and equipment protection; high calcium hardness can cause scale formation on ionizer electrodes and pool surfaces, while low levels may contribute to corrosive water conditions
- Additional Weekly Tests: Consider testing for total dissolved solids (TDS) monthly, as high TDS (above 2000 ppm) can reduce ion effectiveness; test for cyanuric acid (30-50 ppm) if using minimal chlorine supplementation to protect it from UV degradation; occasional testing for phosphates can help identify potential algae nutrients before problems develop
Following water testing, perform a thorough mechanical cleaning of the entire pool ecosystem. Begin by systematically brushing all pool surfaces walls, floor, steps, and behind ladders using appropriate brushes for your pool finish (nylon for vinyl and fiberglass, stainless steel for concrete and plaster). This critical step prevents biofilm formation, disrupts potential algae attachment points, and ensures that any developing issues are physically removed before they can escalate. Pay special attention to areas with poor circulation corners, behind ladders, under steps, and near main drains where problems typically initiate. Follow brushing with comprehensive vacuuming to remove settled debris, using either manual pool vacuum systems or ensuring your automatic cleaner has covered the entire pool surface. For pools with heavy debris load, consider vacuuming to waste to remove contaminants completely from the pool system rather than sending them through the filter.
Comprehensive Cleaning Protocol:
- Systematic Brushing Technique: Use overlapping strokes and methodical patterns to ensure complete coverage; apply firm pressure to disrupt potential biofilm without damaging surfaces; brush toward main drains to facilitate debris removal; include often-neglected areas like light niches, skimmer throats, and behind removable features
- Strategic Vacuuming Procedures: Use slow, overlapping passes for maximum debris removal; vacuum the entire pool floor systematically rather than random patterns; for manual vacuuming, maintain prime in the vacuum head to prevent debris resuspension; clean the filter after heavy vacuuming sessions to maintain efficiency
- Tile and Waterline Care: Weekly scrubbing of tile lines and waterline surfaces prevents scale buildup and removes body oils, sunscreen, and other contaminants that can create nutrient sources for microorganisms; use appropriate tile cleaners that won't affect water balance or ion effectiveness
Conduct detailed maintenance on your ionization equipment and filtration system. Carefully clean the ionizer unit, removing any debris from protective screens and wiping the solar panel surface with appropriate cleaners to maintain optimal energy conversion. For solar ionizers, ensure the panel surface is completely clean, as even thin films of dust or pollen can reduce efficiency by 10-20%. Inspect the ionizer anode for significant scale buildup or wear, cleaning if necessary according to manufacturer instructions using appropriate descaling solutions. Check all visible components for damage, corrosion, or unusual wear patterns. Backwash or clean your filter according to manufacturer recommendations and pressure gauge indications, as clean filters are absolutely essential for maintaining water clarity and proper circulation in ion-stabilized pools. Document all test results, maintenance activities, and observations in a detailed pool log to track trends and identify developing issues long before they affect water quality.
Weekly Testing and Maintenance Specifications:
- Copper Ion Testing and Adjustment: Maintain 0.2-0.5 ppm using test strips or liquid test kits; adjust ionizer output if levels drift outside optimal range; if levels consistently test low, check for high water hardness causing precipitation, excessive organic load consuming ions, or potential equipment issues; if levels test high, reduce ionizer output or operating time
- Silver Ion Management: Maintain 0.005-0.01 ppm if applicable; test monthly if using combination copper-silver systems to extend test kit life; silver ions provide backup protection and are particularly effective against certain bacteria that may develop resistance to copper alone
- pH Monitoring and Correction: Keep between 7.2-7.6 using muriatic acid or soda ash as needed; this range is critical for ion effectiveness and equipment protection; add chemicals in the evening with pump running to ensure proper distribution; retest after 4-6 hours of circulation to verify correction
- Alkalinity and Hardness Balance: Maintain total alkalinity 80-120 ppm and calcium hardness 200-400 ppm for stable water balance; correct alkalinity before addressing pH issues since alkalinity affects pH stability; use sodium bicarbonate to raise alkalinity, muriatic acid to lower it; adjust calcium hardness with calcium chloride or partial water replacement
- Oxidation Supplementation: Add minimal chlorine (0.5-1.0 ppm) weekly to oxidize organic contaminants that ions cannot eliminate; use non-stabilized chlorine (liquid chlorine or calcium hypochlorite) to avoid cyanuric acid buildup; add after sunset to prevent UV degradation; consider non-chlorine oxidizers as alternatives for those with chlorine sensitivities
- Filtration System Maintenance: Backwash sand or DE filters when pressure rises 8-10 psi above clean pressure; clean cartridge filters when pressure indicates or monthly; ensure proper filter operation is essential for removing dead microorganisms and particulates that can cloud water and reduce ion effectiveness
- Ionizer Equipment Care: Inspect anode for scale and wear, cleaning or replacing as needed; verify proper flotation and orientation; ensure solar panels are clean and unobstructed; check for physical damage or performance issues; document equipment observations for trend analysis
By implementing this comprehensive weekly pool maintenance protocol, you establish a proactive care routine that addresses all aspects of ion-stabilized pool operation. This systematic approach not only maintains optimal water quality but also extends equipment life, prevents problems before they develop, and ensures that your pool remains a crystal-clear, inviting oasis with minimal chemical intervention. The time invested in thorough weekly maintenance pays substantial dividends in reduced troubleshooting, fewer emergency treatments, and consistently perfect swimming conditions throughout the entire season.

4. Monthly Maintenance and System Optimization
Monthly maintenance involves more comprehensive system checks and proactive measures to ensure long-term performance and equipment longevity. This extended maintenance session, typically requiring 2-3 hours, goes beyond the routine weekly tasks to address potential issues before they impact system performance or lead to equipment failure. The monthly protocol represents a deep dive into your pool's operational health, combining thorough equipment inspection with advanced water testing and system optimization that ensures your ion-stabilized pool continues to operate at peak efficiency throughout the swimming season.
Begin your monthly maintenance with a detailed inspection and servicing of your solar pool ionizer unit. For most systems, this involves partial or complete disassembly according to manufacturer specifications to access internal components that aren't visible during routine weekly checks. Carefully clean the electrode chamber using appropriate tools and cleaning solutions, paying special attention to removing any scale, mineral deposits, or debris that could impede ion production or disrupt electrical current flow. Use a descaling solution appropriate for your specific ionizer model typically a mild acid solution like vinegar or a commercial descaling product specifically formulated for pool ionization equipment. For stubborn deposits, allow the cleaning solution to soak for the recommended time before gently scrubbing with a soft brush designed for delicate electrode surfaces.
Comprehensive Ionizer Maintenance Protocol:
- Disassembly and Component Inspection: Follow manufacturer guidelines for proper disassembly sequence; document component orientation with photographs if needed; inspect all internal components for wear, corrosion, or damage; check electrode alignment and spacing according to specifications; verify that mounting hardware remains secure and undamaged
- Electrode Chamber Deep Cleaning: Remove all scale and mineral deposits using approved cleaning solutions; pay special attention to hard-to-reach areas and crevices where debris accumulates; use soft-bristled brushes that won't damage delicate electrode surfaces; rinse thoroughly with clean water to remove all cleaning residue; inspect for pitting, erosion, or uneven wear patterns on electrode surfaces
- Anode Assessment and Replacement: Measure anode diameter at multiple points to determine wear percentage; replace if worn more than 50% or showing signs of pitting, cracking, or uneven erosion; document replacement date and initial measurements for future reference; ensure proper installation with secure electrical connections; verify that replacement anode matches manufacturer specifications for composition and size
- Electrical System Verification: Check all electrical connections for corrosion, loose terminals, or damaged wiring; verify proper voltage and current levels during operation if testing equipment is available; inspect insulation for cracks or deterioration; ensure all safety features and grounding systems function properly; test any indicator lights or monitoring systems for accurate operation
- Seal and Gasket Maintenance: Inspect all O-rings, gaskets, and seals for pliability, compression set, or damage; replace any questionable seals regardless of apparent condition; lubricate with appropriate pool-grade lubricants to maintain watertight integrity; verify proper seating and alignment during reassembly; check for potential leak points where components join
Perform a thorough evaluation of your pool's overall ecosystem health through advanced water testing and analysis. Test for total dissolved solids (TDS), maintaining levels below 2000 ppm whenever possible, as high TDS can reduce ion effectiveness by promoting precipitation and creating competitive reactions in the water. Check cyanuric acid (CYA) levels if you use minimal chlorine supplementation, maintaining 30-50 ppm to protect the chlorine from UV degradation without excessively binding the chlorine molecules. Verify the stability of your total alkalinity and calcium hardness levels, as significant monthly fluctuations might indicate underlying water balance issues that could affect long-term equipment performance and ion effectiveness.
Advanced Water Quality Assessment:
- Total Dissolved Solids Management: Test TDS monthly using electronic meters or test strips; levels above 2000 ppm can reduce ion effectiveness and lead to cloudiness; reduce TDS through partial water replacement if levels approach 1500 ppm; identify sources of high TDS such as fill water, chemical additions, or environmental contaminants
- Cyanuric Acid Optimization: Maintain 30-50 ppm if using chlorine supplementation; levels below 30 ppm allow rapid chlorine degradation from UV exposure; levels above 50 ppm can excessively bind chlorine molecules, reducing effectiveness; adjust CYA levels through partial water replacement or careful chemical addition
- Comprehensive Mineral Balance: Verify calcium hardness remains between 200-400 ppm to prevent scale formation or corrosive conditions; confirm total alkalinity stays within 80-120 ppm to maintain pH stability; test for phosphates monthly (keep below 100 ppb) to prevent algae nutrient buildup; check for metals like iron and manganese that could cause staining
- Seasonal Water Analysis: Adjust testing frequency and parameters based on seasonal changes; increase testing during heavy use periods or extreme weather conditions; compare monthly results to identify developing trends; consult professional water analysis if persistent issues occur despite proper maintenance
Conduct a comprehensive inspection and cleaning of all pool components and accessories where biofilm, scale, or debris can accumulate unnoticed. Remove and thoroughly clean pool lights, checking for moisture intrusion, damaged seals, or corrosion in the housing. Inspect ladders, handrails, and diving boards for secure mounting and any signs of corrosion or deterioration. Clean behind removable features and in normally inaccessible areas where biofilm can develop. Examine skimmer throats, weirs, and baskets for wear or damage, replacing components as needed to maintain optimal surface cleaning efficiency.
Preventive Maintenance and Component Care:
- Comprehensive Fixture Inspection: Remove and clean pool lights, checking seals and electrical connections; inspect ladders, handrails, and steps for corrosion, loose fittings, or sharp edges; examine diving boards and slides for structural integrity and secure mounting; clean behind and beneath all removable features where debris accumulates
- Hidden Area Biofilm Prevention: Check behind light niches, under ladder treads, and inside skimmer throats for biofilm development; use appropriate cleaners and brushes for each surface type; pay special attention to areas with poor circulation where problems typically initiate; consider using enzyme treatments in problem areas to break down organic films
- Structural Surface Assessment: Inspect pool surfaces for early signs of scale formation, staining, or deterioration; check tile lines and coping for loose pieces or deteriorating grout; examine vinyl liners for fading, stretching, or potential leak points; inspect plaster surfaces for roughness, staining, or erosion that might indicate water balance issues
Evaluate and optimize your pool's circulation system to ensure proper distribution of ions throughout the entire water volume. Check water flow patterns by observing the movement of floating objects or using pool-safe dyes to visualize current directions. Adjust return jets as needed to eliminate dead spots where ions might not circulate effectively, typically creating a circular flow pattern that ensures all areas receive adequate water movement. Verify pump performance by checking pressure gauges, listening for unusual noises, and ensuring consistent flow rates. Clean skimmer and pool pump baskets thoroughly, inspecting for cracks or damage that could affect operation. Review your maintenance logs from the previous month to identify any trends or recurring issues that might indicate systemic problems requiring attention, such as consistently low ion levels in specific areas or repeated pH fluctuations that suggest underlying balance issues.
Monthly System Optimization Tasks:
- Comprehensive Ionizer Maintenance: Disassemble and clean electrode chamber according to manufacturer specifications; inspect and replace anode if worn more than 50% or showing signs of deterioration; verify all electrical connections remain secure and corrosion-free; check seals and O-rings for pliability and replace annually; document component condition and performance metrics
- Advanced Water Testing and Analysis: Test total dissolved solids (maintain below 2000 ppm for optimal ion effectiveness); check cyanuric acid levels (30-50 ppm if using chlorine supplementation); verify total alkalinity (80-120 ppm) and calcium hardness (200-400 ppm) stability; test for phosphates and other potential contaminants; compare results with previous months to identify trends
- Circulation System Optimization: Evaluate and adjust return jet directions to eliminate dead spots; verify pump performance through pressure readings and flow verification; clean skimmer and pump baskets thoroughly; check valve operation and positioning; ensure automatic cleaners or water features don't disrupt optimal circulation patterns
- Preventive Maintenance Measures: Inspect for early signs of scale formation on surfaces and equipment; check for biofilm development in hidden or low-circulation areas; verify proper water level for optimal skimmer operation; examine all pool equipment for wear, leaks, or performance issues; lubricate moving parts as needed
- Documentation and Performance Review: Update maintenance logs with all monthly findings and procedures; compare current performance metrics with historical data; identify any developing trends or recurring issues; schedule any necessary repairs or professional services; adjust maintenance routines based on observed patterns and seasonal changes
By implementing this comprehensive monthly maintenance protocol, you establish a proactive approach to pool care that addresses potential issues long before they affect water quality or equipment performance. This systematic monthly investment not only ensures optimal operation of your ion-stabilized pool but also extends equipment lifespan, reduces unexpected repairs, and maintains the consistent water quality that makes ionization technology such a valuable pool maintenance solution. The detailed attention given during monthly maintenance sessions pays substantial dividends in reduced weekly maintenance time, fewer water quality issues, and years of reliable, trouble-free pool operation.

5. Seasonal Adjustments and Climate Considerations
Ion-stabilized pools require specific seasonal adjustments to maintain optimal performance through changing environmental conditions, varying usage patterns, and fluctuating temperatures that significantly impact pool water chemistry and biological activity. Understanding these seasonal rhythms and implementing appropriate maintenance adaptations ensures your ionization system provides consistent, effective sanitation year-round while maximizing equipment longevity and minimizing chemical interventions. This comprehensive seasonal guide addresses the unique requirements of each season, providing detailed protocols for transitioning your ion-stabilized pool through the annual cycle of opening, peak operation, wind-down, and winterization or cold-weather operation.
Spring Startup and System Reactivation
Spring startup represents the most critical seasonal transition for ion-stabilized pools, setting the foundation for an entire season of trouble-free operation. Begin by removing and properly storing your winter cover, taking care to prevent debris and stagnant cover water from entering the pool. Conduct a comprehensive system startup that includes thorough cleaning of all pool surfaces, filtration system reactivation, and careful water balance restoration. Remove any winterizing plugs, reopen closed valves, and verify that all circulation system components operate correctly before introducing your ionizer to the water.
Inspect your ionization pool equipment meticulously after its winter storage period. Check for any damage that may have occurred during storage, including cracks in housing, corrosion on electrical components, or deterioration of seals and O-rings. Install a fresh anode if the existing one shows significant wear (typically more than 50% depletion) or any signs of pitting, cracking, or uneven erosion. Even if the anode appears serviceable, consider replacement if it has been in use for multiple seasons, as starting with a new anode ensures maximum ion production efficiency during the critical early season when algae and bacteria are most active. Once the ionizer is operational in the pool, allow 24-48 hours for copper ion levels to stabilize before permitting swimming, as this stabilization period ensures adequate sanitizer levels throughout the entire water volume.
Detailed Spring Startup Protocol:
- Pre-Opening Preparation: Remove winter cover carefully to prevent debris entry; clean and properly store cover for longevity; inspect pool structure for winter damage; remove winterizing plugs and reopen closed plumbing lines; verify pool water level is appropriate for operation
- Initial System Activation: Restore power to pool equipment following proper startup sequences; prime pump and verify proper water flow; check for leaks in plumbing and equipment; run filtration system continuously for 24-48 hours to clear winter accumulation; backwash or clean filter after initial cleaning cycle
- Comprehensive Cleaning Regimen: Thoroughly brush all pool surfaces to remove winter biofilm and debris; vacuum entire pool, preferably to waste if significant debris is present; clean tile lines and waterline surfaces; empty and clean skimmer and pump baskets; ensure all circulation system components are clean and functional
- Water Balance Restoration: Test and adjust total alkalinity first (80-120 ppm) to provide pH stability; correct pH to optimal range (7.2-7.6) for ion effectiveness; adjust calcium hardness (200-400 ppm) to prevent scale or corrosion; test for metals and treat if necessary; establish baseline water chemistry documentation
- Ionization System Commissioning: Inspect ionizer for storage damage and component integrity; install fresh anode if needed for optimal season start; verify proper operation before pool placement; position ionizer for maximum sun exposure and free movement; monitor ion levels during 24-48 hour stabilization period
Summer Peak Season Management
Summer represents the period of highest demand for your ionization system, with increased bather load, elevated temperatures, intense sunlight, and potential heavy rainfall all affecting water balance and sanitizer demand. Increase monitoring frequency during periods of heavy use, testing key parameters 2-3 times weekly rather than the standard once-weekly schedule. Pay particular attention to pH levels, as heavy swimmer load can cause rapid pH fluctuations that affect ion effectiveness. During extreme heat waves, consider enhancing circulation by running your filtration system an additional 2-4 hours daily to ensure proper ion distribution and prevent dead spots where algae could develop.
Consider slightly increasing ion production during peak algae season (typically mid-summer in most regions) if your system allows adjustment, as higher water temperatures and increased sunlight intensity create ideal conditions for algae blooms. Implement additional oxidation after heavy swimmer loads or pool parties using non-chlorine oxidizers or minimal chlorine (0.5-1.0 ppm) to address organic contaminants that ions cannot eliminate. Monitor total dissolved solids more frequently during peak season, as evaporation and chemical additions can rapidly increase TDS levels that reduce ion effectiveness. Adjust your maintenance schedule based on actual usage patterns rather than calendar dates, increasing attention during high-use periods and relaxing slightly during quieter weeks.
Summer Optimization Strategies:
- Enhanced Monitoring Protocol: Test pH and chlorine 2-3 times weekly during heavy use periods; check copper ion levels weekly with additional verification after heavy rains; monitor total alkalinity biweekly to maintain stability; increase visual inspections for early problem detection; document all test results for trend analysis
- Ion Production Adjustment: Consider increasing ion output by 10-20% during peak algae season; monitor ion levels carefully to avoid exceeding 0.5 ppm copper concentration; adjust based on actual water conditions rather than predetermined schedules; return to normal settings when conditions moderate
- Circulation Enhancement: Increase filtration time during extreme heat (additional 2-4 hours daily); verify pool return jet positioning for optimal flow patterns; ensure skimmers are operating at maximum efficiency; consider supplemental circulation in problem areas if dead spots persist
- Oxidation Management: Implement additional oxidation after heavy bather loads; use non-chlorine oxidizers to avoid chemical conflicts; maintain minimal chlorine levels (0.5-1.0 ppm) for oxidation backup; shock treat after severe weather events or visible water quality issues
Fall Transition and System Wind-Down
Fall maintenance focuses on preparing your ion-stabilized pool for reduced usage and eventual winterization as temperatures decline and swimming activity decreases. Begin by gradually reducing ion production as water temperatures drop below 70°F (21°C) and usage patterns decline, as colder water naturally inhibits bacterial and algal growth, reducing sanitizer demand. Perform a final thorough cleaning of the entire pool system, including comprehensive brushing, vacuuming, and filter maintenance to remove seasonal accumulation and prevent issues during the off-season. Balance water chemistry carefully before closing, paying particular attention to pH and alkalinity levels that will remain relatively stable during the winter months.
Document system performance and maintenance activities thoroughly, noting any issues encountered during the season, component replacement dates, and observations that might inform next year's startup procedures. As part of your fall transition, consider conducting a professional water analysis to identify any developing issues that aren't apparent through routine testing. Reduce filtration time gradually as temperatures drop and organic load decreases, ultimately settling on a maintenance schedule appropriate for your climate and whether the pool will remain open or be closed for winter.
Fall Transition Procedures:
- Gradual System Reduction: Reduce ion production as temperatures drop below 70°F (21°C); decrease filtration time as organic load diminishes; scale back monitoring frequency while maintaining weekly checks; adjust chemical supplementation based on reduced usage
- Comprehensive Season-End Cleaning: Perform thorough brushing of all surfaces to remove seasonal biofilm; vacuum entire pool, paying special attention to settled debris; clean filter thoroughly and prepare for storage or reduced operation; scrub tile lines and waterline to prevent staining
- Pre-Closing Water Balance: Adjust pH to 7.4-7.6 for winter stability; set total alkalinity at 80-100 ppm; ensure calcium hardness is within 200-400 ppm range; add winterizing algaecide if closing pool; document final water chemistry readings
- System Documentation and Assessment: Record component performance and replacement history; note any issues encountered during the season; document maintenance schedule effectiveness; plan improvements for next season; schedule professional services if needed during off-season
Winter Operation and Storage Protocols
Winter management of ion-stabilized pools varies significantly based on climate, with different protocols for regions where pools remain open versus those requiring complete winterization. In mild climates where pools remain operational, maintain reduced but consistent ion production appropriate for colder water temperatures and minimal usage. Adjust monitoring frequency to biweekly or monthly, focusing on key parameters rather than comprehensive testing. Run filtration systems according to reduced schedules, typically 4-6 hours daily, to maximize pool water clarity and ion distribution while conserving energy.
For pools requiring complete winterization, proper ionizer storage is crucial for maintaining equipment integrity and performance. Remove the ionizer according to manufacturer instructions, carefully disconnecting any electrical connections and noting proper reassembly sequences. Clean all components thoroughly, paying special attention to electrode chambers and protective screens where debris and scale can accumulate. Allow all parts to dry completely before storage to prevent mold, corrosion, or mineral deposition during the off-season. Store the unit in its original packaging or a suitable container in a climate-controlled environment protected from temperature extremes, humidity, and physical damage.
Winter Management Guidelines:
- Open Pool Winter Operation: Maintain consistent but reduced ion production for cold water conditions; adjust monitoring to biweekly or monthly schedule; reduce filtration to 4-6 hours daily; protect equipment from freezing during cold snaps; use pool covers to reduce debris and heat loss
- Complete Winterization Protocol: Remove ionizer following manufacturer guidelines; clean all components thoroughly and allow complete drying; store in climate-controlled environment (40-80°F / 4-27°C); protect from physical damage and moisture; document storage condition and location
- Equipment Protection Measures: Winterize circulation system according to standard protocols; protect against freeze damage in all plumbing; remove and store accessories properly; secure pool area for winter safety; schedule off-season maintenance or repairs
- Off-Season Planning: Review season performance and identify improvements; research equipment upgrades or replacements; schedule professional services during off-season; purchase consumables for next season; update maintenance protocols based on experience
Comprehensive Seasonal Maintenance Guidelines:
- Spring Startup: Comprehensive system cleaning and inspection; water balance restoration and stabilization; fresh anode installation if needed; 24-48 hour ion stabilization period before use; documentation of startup procedures and initial conditions
- Summer Peak Season: Increased monitoring frequency during heavy use; potential ion production adjustment for peak demand; enhanced circulation during extreme heat; additional oxidation after heavy swimmer loads; proactive algae and bacteria prevention
- Fall Transition: Gradual reduction in ion production and system operation; final thorough cleaning and maintenance; water balance preparation for closing or reduced operation; comprehensive system performance documentation; planning for winter or next season
- Winter Operation/Storage: For open pools: reduced but consistent ion production with adjusted monitoring; for closed pools: proper winterization and protected storage of ionizer equipment; off-season maintenance and improvement planning; preparation for spring reactivation
By implementing these detailed seasonal adjustments, you ensure that your ion-stabilized pool maintains optimal performance throughout the year while adapting to changing environmental conditions and usage patterns. This proactive seasonal approach not only maximizes the effectiveness of your ionization system but also extends equipment life, reduces chemical usage, and ensures that your pool remains a clean, inviting oasis regardless of the season. The attention given to proper seasonal transitions represents one of the most valuable investments in long-term pool health and owner satisfaction.
![]()
6. Ionizer Equipment Maintenance and Care
Proper maintenance of your ionization equipment is absolutely essential for consistent performance, optimal ion production, and long-term system reliability. Unlike traditional chemical feeders that require minimal mechanical maintenance, ionization systems incorporate sophisticated electronic, electrochemical, and mechanical components that demand regular attention to maintain peak efficiency. This comprehensive equipment maintenance guide covers all aspects of ionizer care, from routine cleaning to component replacement, ensuring your system delivers consistent, chemical-free water purification season after season while maximizing your investment through extended equipment lifespan.
Solar-Powered Ionizer Maintenance Protocol
For solar pool ionizers users, regular maintenance begins with the photovoltaic panel that serves as the system's power plant. Clean the solar panel surface every 1-2 weeks using appropriate methods and materials to maintain optimal energy conversion efficiency. Even thin layers of dust, pollen, or mineral deposits can reduce power output by 15-30%, directly impacting ion production rates. Use soft, lint-free microfiber cloths and mild, non-abrasive cleaning solutions specifically formulated for optical surfaces or photovoltaic panels. Avoid harsh chemicals, abrasive cleaners, or high-pressure sprays that could damage the anti-reflective coating, protective encapsulation, or delicate photovoltaic cells beneath the surface.
Inspect the floating mechanism regularly to ensure proper buoyancy and orientation, as these factors directly impact both solar exposure and ion distribution. The unit should float upright with the solar panel angled toward the sky at the manufacturer's specified orientation (typically 15-30 degrees from horizontal). Check that the ionizer moves freely around the pool rather than becoming trapped in corners or against walls where water circulation might be limited. Verify that protective screens remain clear of debris accumulation that could restrict water flow to the electrodes, as adequate water movement through the electrode chamber is crucial for consistent ion release and distribution. For units with performance indicators or monitoring systems, verify that all displays, lights, or electronic readouts function correctly according to manufacturer specifications.
Detailed Solar Ionizer Maintenance Procedures:
- Photovoltaic Panel Optimization: Clean every 1-2 weeks with distilled water and mild detergent; inspect for microcracks, delamination, or cell discoloration monthly; verify proper output voltage (typically 1.5-3V) during peak sunlight hours; ensure no shading during prime operating hours (10am-4pm); protect from physical impact and extreme temperature fluctuations
- Floating System Verification: Check buoyancy weekly unit should float upright without excessive tilting; verify freedom of movement around entire pool; ensure no water intrusion into flotation chambers; inspect for damage to floating housing or components; confirm proper weight distribution for optimal solar orientation
- Water Flow Management: Inspect protective screens for debris accumulation during weekly cleaning; verify adequate water movement through electrode chamber; check intake and outflow ports for obstructions; ensure screens remain securely attached without tears or deformation; clean with soft pool brushes to prevent damage to fine mesh
- Electronic System Monitoring: Verify performance indicators function correctly; check for error codes or warning lights; ensure wireless connectivity if equipped with remote monitoring; test any audible alarms or notification systems; document any electronic issues for warranty claims
Hardwired Ionizer System Maintenance
For hardwired ionizer systems, maintenance focuses on electrical integrity, controller functionality, and proper installation parameters. Monthly, verify all electrical connections remain secure, corrosion-free, and properly insulated according to National Electrical Code standards and manufacturer specifications. Check control panel settings to ensure they match your pool's requirements, including appropriate voltage settings, timer operations, and ion output levels. Inspect all wiring for signs of wear, rodent damage, or environmental degradation, paying special attention to areas where cables enter conduit or connection boxes.
Test system operation by verifying current flow to the electrode chamber and confirming appropriate ion production rates based on controller settings. For systems with digital displays or programmable features, ensure all settings remain correctly configured and haven't been accidentally changed or reset. Check ground fault circuit interrupter (GFCI) protection if installed, testing according to manufacturer recommendations to ensure electrical safety. Document all electrical measurements and observations to establish performance baselines and identify developing issues before they cause system failure.
Hardwired System Maintenance Specifications:
- Electrical System Verification: Monthly inspection of all connections for tightness and corrosion; verify proper voltage (typically 12-24V AC/DC) at electrode terminals; check amperage draw against manufacturer specifications; ensure all conduit and junction boxes remain sealed and watertight; test GFCI protection monthly
- Controller Operation Assessment: Verify timer settings match operational requirements; check ion output levels correspond to controller settings; ensure display readings are accurate and responsive; test alarm systems and safety shutoffs; document any error codes or malfunction indicators
- Installation Integrity Check: Confirm proper mounting and secure installation; check for vibration-induced loosening of components; verify adequate clearance around electrical components; ensure proper labeling of all controls and connections; validate compliance with local electrical codes
Anode Maintenance and Replacement Protocol
The anode serves as the consumable heart of the ionization system, requiring particular attention to maintain consistent ion production. Clean the anode every 2-4 weeks to remove scale buildup, using appropriate cleaning solutions and techniques that prevent damage to the delicate electrode surface. The cleaning frequency should be adjusted based on your water hardness more frequent cleaning (every 2 weeks) for hard water above 250 ppm calcium hardness, less frequent (every 4 weeks) for soft water below 150 ppm. Use a descaling solution of white vinegar and water (1:4 ratio) or commercial descaling products specifically formulated for pool ionization equipment.
Replace the anode according to manufacturer recommendations, typically every 4-6 months depending on pool size, usage patterns, and water chemistry. For larger pools (over 20,000 gallons) or those with heavy usage, replacement may be needed every 3-4 months, while smaller, lightly used pools might extend anode life to 6-8 months. Monitor anode wear by regularly measuring diameter reduction with calipers and watching for performance decline indicators like difficulty maintaining copper ion levels or reduced bubble production. Keep detailed records of anode replacement dates, initial dimensions, and performance observations to establish your specific replacement schedule based on actual usage conditions rather than generic timelines.
Comprehensive Anode Care Procedures:
- Regular Cleaning Protocol: Clean every 2-4 weeks based on pool water hardness; use appropriate descaling solutions (vinegar/water or commercial descalers); gently brush with soft nylon brushes to prevent surface damage; rinse thoroughly with clean water after descaling; inspect for pitting, cracking, or uneven wear during cleaning
- Replacement Scheduling: Replace every 4-6 months under normal conditions; more frequently (3-4 months) for large pools or heavy use; less frequently (6-8 months) for small, lightly used pools; replace immediately if diameter reduced by 50% or physical damage observed; document all replacement dates and observations
- Performance Monitoring: Measure diameter reduction monthly with precision calipers; track ion production efficiency relative to anode age; note changes in bubble production patterns; monitor electrical current draw during operation; establish performance baselines for comparison
- Installation Best Practices: Ensure proper orientation according to manufacturer markings; verify secure electrical connections without over-tightening; use appropriate sealants or lubricants on threads if recommended; confirm compatibility with your specific ionizer model; test system operation after replacement
Electrode Chamber and Component Care
The electrode chamber requires monthly inspection and comprehensive cleaning to maintain optimal ion production and prevent component failure. During monthly maintenance, disassemble the chamber according to manufacturer specifications, taking care to note component orientation and connection sequences. Clean all internal surfaces thoroughly, removing any scale, mineral deposits, or debris that could impede ion production or disrupt electrical current flow. Pay particular attention to the cathode assembly, typically made of titanium with platinum coating, ensuring it remains free of scale and shows no signs of coating degradation.
Verify proper water flow through the chamber by inspecting intake and outflow channels for obstructions and ensuring protective screens remain intact and functional. Check all electrical connections within the chamber for corrosion, loose terminals, or damaged wiring that could affect system performance. Inspect seals, O-rings, and gaskets for pliability, compression set, or damage, replacing them annually or at the first signs of deterioration to prevent water intrusion into electrical components. Document the condition of all chamber components during each monthly inspection to track wear patterns and anticipate replacement needs.
Electrode Chamber Maintenance Specifications:
- Monthly Inspection Protocol: Disassemble chamber according to manufacturer guidelines; clean all internal surfaces with appropriate solutions; inspect for corrosion, scale buildup, or physical damage; verify electrode alignment and spacing; check all electrical connections and components
- Cathode Assessment and Care: Inspect platinum coating for uniformity and adhesion; check for discoloration, pitting, or coating loss; clean gently with soft cloths and mild detergents; avoid abrasive materials that could damage coating; monitor for performance degradation over time
- Sealing System Maintenance: Inspect all O-rings, gaskets, and seals monthly; replace annually or at first signs of deterioration; use appropriate lubricants to maintain pliability; verify proper seating and compression during reassembly; check for potential leak points
Comprehensive Equipment Maintenance Specifications:
- Solar Panel Care: Clean every 1-2 weeks with appropriate materials and techniques; inspect monthly for physical damage including cracks, delamination, or cell discoloration; verify proper orientation and flotation for maximum sun exposure; protect from impact, extreme temperatures, and chemical exposure; document cleaning schedule and observations
- Anode Maintenance: Clean every 2-4 weeks to remove scale using vinegar solutions or commercial descalers; replace every 4-6 months or when 50% depleted based on diameter measurements; monitor for even wear patterns and performance consistency; maintain replacement records and performance history; ensure proper installation and electrical connection
- Electrode Chamber Care: Monthly inspection, disassembly, and thorough cleaning; verify proper water flow and clear passageways; check for corrosion, scale buildup, or component damage; ensure secure electrical connections and proper electrode spacing; document component condition and maintenance activities
- General Equipment Care: Protect from physical damage through careful handling and proper storage; store correctly during off-season in climate-controlled environments; follow all manufacturer-specific maintenance recommendations and intervals; maintain detailed service records and warranty documentation; seek professional service for complex issues beyond owner expertise
- Preventive Maintenance Schedule: Daily visual inspections for obvious issues; weekly cleaning and basic verification; monthly comprehensive component inspection and maintenance; seasonal deep cleaning and system optimization; annual professional assessment for complex systems
By implementing this comprehensive equipment maintenance protocol, you ensure that your ionization system operates at peak efficiency throughout its service life while minimizing unexpected failures and maximizing return on investment. The systematic approach to equipment care not only maintains optimal water quality but also extends component lifespan, reduces operating costs, and ensures that your pool remains a crystal-clear pool water, chemical-minimized oasis for years to come. Remember that consistent, proper equipment maintenance is significantly more cost-effective than dealing with the consequences of neglect, making these routines well worth the minimal time investment they require.
7. Troubleshooting Common Ion Pool Issues
Even with proper pool maintenance, ion-stabilized pools can experience occasional issues that require specific troubleshooting approaches. For cloudy water, first check and adjust pH and alkalinity, then verify proper filtration and circulation. If cloudiness persists, check ion levels and increase production temporarily if below optimal range. For algae growth, first perform a thorough brushing and vacuuming, then shock with a non-chlorine oxidizer or minimal chlorine, and verify ion levels are adequate. Improve circulation in affected areas and consider temporarily increasing ion production until the issue resolves.
If ion levels consistently test low despite proper equipment operation, check for high water hardness that might cause ions to precipitate out of solution. Verify that the ionizer is producing adequately by checking for visible bubbles from the electrode chamber in sunlight. For persistent water quality issues, consider the possibility of high bather load, inadequate filtration, or environmental factors overwhelming the system. When troubleshooting, always address one variable at a time and document changes to identify what resolves the issue. For equipment-specific problems, consult manufacturer troubleshooting guides or contact technical support for specialized assistance.
Common Issues and Solutions:
- Cloudy Water: Check/adjust pH and alkalinity; verify proper filtration; ensure adequate circulation; check ion levels; clean filter if needed
- Algae Growth: Brush and vacuum thoroughly; shock with oxidizer; verify ion levels; improve circulation; temporarily increase ion production
- Low Ion Levels: Check ionizer operation; inspect for scale on anode; verify proper water chemistry; check for high TDS causing precipitation
- Equipment Issues: Consult manufacturer guides; check electrical connections; verify proper installation; contact technical support for persistent problems
By following this comprehensive maintenance guide, you can enjoy all the benefits of ion-stabilized pool ownership crystal-clear water, reduced chemical usage, and minimal maintenance time while avoiding common pitfalls. Remember that consistency is key with ion pool maintenance; regular attention prevents small issues from becoming major problems. With proper care, your ion-stabilized pool will provide years of trouble-free, chemical-minimized swimming enjoyment for you and your family.