Taylor Technologies K-1106 is a professional phosphate test kit that measures phosphate levels from 0 to 3000 ppb in pool water. Fill test tube to mark, add reagents, shake, wait 3 minutes, compare color to chart. Target phosphate level is below 500 ppb to prevent algae growth. This guide covers complete testing procedures, result interpretation, and phosphate reduction strategies for maintaining algae free pool water.
Table of Contents
- What are Phosphates and Why Test?
- About Taylor K-1106 Test Kit
- Before You Begin: Preparation
- Step by Step Testing Procedure
- Interpreting Your Test Results
- How to Reduce Phosphate Levels
- Ongoing Testing and Maintenance
- Pro Tips for Accurate Testing
- Troubleshooting Common Issues
- Frequently Asked Questions
What are Phosphates and Why Test?
Phosphates are nutrients that enter pool water from various sources including fertilizers, leaves, pollen, and swimmer waste. While phosphates themselves are not harmful to swimmers, they serve as food for algae, promoting rapid algae growth even when chlorine levels are adequate. Testing and controlling phosphate levels is essential for preventing persistent algae problems and maintaining crystal clear pool water.
Common Sources of Pool Phosphates
- Fertilizers and lawn chemicals washing into pool
- Leaves, grass clippings, and organic debris
- Pollen from trees and plants
- Swimmer body oils and cosmetics
- Some pool chemicals and water treatments
- Fill water from certain municipal sources
- Rainwater runoff from surrounding areas
- Decomposing organic matter
Why Phosphate Testing Matters
- Prevents recurring algae blooms
- Reduces chlorine consumption
- Improves water clarity and quality
- Identifies hidden cause of algae problems
- Allows targeted phosphate removal treatment
- Reduces need for excessive shocking
- Maintains balanced pool chemistry
- Saves money on algae treatments
Understanding phosphate levels helps you maintain clear water alongside proper weekly pool cleaning routines.
About Taylor K-1106 Test Kit
The Taylor Technologies K-1106 is a professional grade phosphate test kit designed for accurate measurement of orthophosphate levels in swimming pool and spa water. This colorimetric test kit uses reagent chemistry to produce a color change that corresponds to phosphate concentration, providing reliable results in the 0 to 3000 parts per billion (ppb) range.
Key Features of K-1106 Test Kit
- Professional accuracy: Laboratory quality results at home
- Wide range testing: Measures 0 to 3000 ppb phosphates
- Complete kit: Includes all reagents and testing equipment
- Easy to use: Simple colorimetric testing method
- Quick results: Get readings in 3 minutes
- Durable components: High quality test tubes and comparator
- Clear instructions: Step by step testing guide included
- Multiple tests: Kit provides approximately 50 tests
What's Included in the Kit
- Test tube with cap and measurement marks
- Color comparator chart
- R-1001 Phosphate Reagent #1
- R-1002 Phosphate Reagent #2
- Detailed instruction manual
- Storage case for all components
Before You Begin: Preparation
When to Test for Phosphates
Test phosphate levels in these situations:
- Recurring algae problems despite proper chlorine levels
- At pool opening each season
- After heavy rain or storms
- When algae returns quickly after treatment
- Monthly during peak season
- After adding new fill water
- When water appears dull or cloudy
- Before adding phosphate remover products
Pre Testing Checklist
- Ensure test kit reagents are not expired
- Clean test tube thoroughly with pool water
- Collect water sample from elbow depth
- Test in shaded area away from direct sunlight
- Have pen and paper ready to record results
- Read instruction manual if first time testing
- Ensure reagent bottles are tightly sealed when not in use
Safety Precautions
- Keep reagents away from children and pets
- Do not ingest reagents or test water
- Avoid contact with skin and eyes
- Store reagents in cool, dry location
- Do not mix reagents with other chemicals
- Wash hands after testing
- Dispose of test water properly
Step by Step Testing Procedure
Step 1: Collect Water Sample
Obtain a representative water sample:
- Rinse test tube three times with pool water
- Collect sample from elbow depth in pool
- Sample away from return jets and skimmers
- Avoid surface water or bottom water
- Fill test tube to the marked line (typically 10 mL)
- Ensure accurate fill level for precise results
Step 2: Add Reagent #1
Add the first phosphate reagent:
- Hold test tube steady on flat surface
- Open R-1001 Phosphate Reagent #1 bottle
- Add specified number of drops (check instructions, typically 5 drops)
- Hold bottle vertically for consistent drop size
- Count drops carefully
- Replace cap on reagent bottle immediately
Step 3: Mix Solution
Thoroughly mix the reagent with water sample:
- Cap test tube securely
- Invert tube several times to mix
- Shake gently for 10 to 15 seconds
- Ensure complete mixing of reagent
- Solution may begin to show color change
Step 4: Add Reagent #2
Add the second phosphate reagent:
- Remove cap from test tube
- Open R-1002 Phosphate Reagent #2 bottle
- Add specified number of drops (check instructions, typically 5 drops)
- Hold bottle vertically for consistent drops
- Count drops carefully
- Replace cap on reagent bottle immediately
Step 5: Mix and Wait
Final mixing and development time:
- Cap test tube securely
- Invert tube several times to mix thoroughly
- Shake gently for 10 to 15 seconds
- Place tube on flat surface
- Wait exactly 3 minutes for color to fully develop
- Do not disturb tube during waiting period
- Set timer to ensure accurate timing
Step 6: Read Results
Compare color to determine phosphate level:
- After 3 minutes, pick up test tube
- Hold tube against white background
- Compare color to color comparator chart
- Match color as closely as possible
- Read phosphate level in ppb (parts per billion)
- Record result with date and time
- If color is between two standards, estimate value
Step 7: Clean Up
Properly clean and store testing equipment:
- Dispose of test water (do not return to pool)
- Rinse test tube thoroughly with clean water
- Shake out excess water
- Allow test tube to air dry
- Ensure reagent bottle caps are tight
- Store kit in cool, dry location
- Keep away from direct sunlight
Interpreting Your Test Results
Phosphate Level Guidelines
Understanding what your phosphate reading means:
0 to 100 ppb: Excellent
- Minimal algae food source
- Ideal phosphate level
- No treatment needed
- Continue regular maintenance
100 to 500 ppb: Good
- Low to moderate phosphate levels
- Algae growth possible but manageable
- Monitor closely during warm weather
- Consider phosphate remover if algae appears
500 to 1000 ppb: Moderate
- Elevated phosphate levels
- Increased algae growth risk
- Treatment recommended
- Use phosphate remover product
- Identify and eliminate phosphate sources
1000 to 3000 ppb: High
- Very high phosphate levels
- Significant algae growth risk
- Immediate treatment required
- Use phosphate remover at full dosage
- May need multiple treatments
- Investigate phosphate sources
Above 3000 ppb: Severe
- Extremely high phosphate levels
- Algae blooms highly likely
- Aggressive treatment needed
- Multiple phosphate remover applications
- Address underlying contamination source
- Consider partial drain and refill
Factors Affecting Phosphate Levels
- Surrounding landscape and vegetation
- Frequency of rain and storms
- Pool location and exposure
- Bather load and pool usage
- Quality of fill water
- Nearby fertilizer use
- Organic debris accumulation
How to Reduce Phosphate Levels
Using Phosphate Remover Products
Chemical phosphate removers are the most effective solution:
- Choose quality phosphate remover product
- Calculate dosage based on test results and pool volume
- Add phosphate remover with pump running
- Pour around pool perimeter for even distribution
- Run pump continuously for 24 to 48 hours
- Clean or backwash filter after 24 hours
- Retest phosphates after 48 to 72 hours
- Repeat treatment if levels remain high
Preventing Phosphate Buildup
Reduce phosphate introduction to your pool:
- Skim leaves and debris daily
- Trim overhanging trees and bushes
- Avoid fertilizing near pool area
- Shower before entering pool
- Use pool cover when not in use
- Clean pool regularly with quality pool brushes
- Maintain proper water chemistry
- Use automatic pool cleaners for debris removal
Learn about dealing with leaves and debris to minimize phosphate introduction.
Natural Phosphate Reduction Methods
- Regular vacuuming removes phosphate containing debris
- Frequent filter cleaning removes trapped phosphates
- Partial water replacement dilutes phosphate concentration
- Proper circulation prevents phosphate accumulation
- Maintaining balanced chemistry optimizes phosphate control
Combining Phosphate Control with Algae Prevention
For comprehensive algae prevention:
- Maintain proper chlorine levels (1 to 3 ppm)
- Keep phosphates below 500 ppb
- Use algaecide preventively (like No Mor Problems Algaecide)
- Brush pool surfaces weekly
- Maintain proper water balance
- Consider mineral sanitization systems
For persistent algae issues, see how to fix green pool quickly and learn about treating resistant algae types.
Ongoing Testing and Maintenance
Testing Frequency Recommendations
Monthly Testing: Standard maintenance schedule
- Test once per month during swim season
- Test at pool opening and closing
- Sufficient for pools without algae history
Bi Weekly Testing: Enhanced monitoring
- Test every 2 weeks during peak season
- Recommended for pools with algae history
- Good for pools near heavy vegetation
Weekly Testing: Intensive monitoring
- Test weekly if fighting recurring algae
- During phosphate removal treatment
- After heavy storms or debris accumulation
Record Keeping
Track phosphate levels over time:
- Record date and time of each test
- Note phosphate level in ppb
- Document any treatments applied
- Track weather conditions and events
- Note algae presence or water quality issues
- Identify patterns and trends
- Adjust maintenance based on historical data
Seasonal Considerations
Spring:
- Test at pool opening
- Expect elevated levels after winter
- Treat before algae season begins
- Establish baseline for season
Summer:
- Test monthly or more frequently
- Monitor during peak algae season
- Test after storms and heavy use
- Maintain levels below 500 ppb
Fall:
- Test before closing pool
- Treat high levels before winterizing
- Reduce phosphate food source for winter
Pro Tips for Accurate Testing
Expert Tips from Pool Professionals
- Test in shade: Direct sunlight affects color development
- Use fresh reagents: Check expiration dates regularly
- Count drops carefully: Accuracy depends on precise reagent amounts
- Time exactly: Wait full 3 minutes for color development
- Clean test tube: Rinse thoroughly between tests
- Sample from mid depth: Avoid surface and bottom water
- Test before treating: Know baseline before adding phosphate remover
- Retest after treatment: Verify phosphate remover effectiveness
- Store properly: Keep reagents cool and dry
- Replace annually: Reagents lose effectiveness over time
Avoid Common Testing Mistakes
- Using expired reagents: Results will be inaccurate
- Incorrect drop count: Too many or too few drops
- Insufficient mixing: Incomplete reagent distribution
- Wrong timing: Reading results too early or too late
- Dirty test tube: Contamination affects results
- Testing in sunlight: UV affects color development
- Not recording results: Lose valuable tracking data
- Ignoring high readings: Delaying treatment allows algae growth
Avoid common pool maintenance mistakes that can affect water quality.
Maximizing Test Kit Lifespan
- Store in cool location (below 80°F)
- Keep away from direct sunlight
- Ensure bottle caps are tight after each use
- Do not contaminate reagents with other chemicals
- Clean and dry test tube after each use
- Replace reagents when expired
- Keep instruction manual with kit
- Store in original case for protection
Troubleshooting Common Issues
Problem: Color Doesn't Match Chart
Solutions:
- Ensure you waited full 3 minutes
- Check reagents are not expired
- Verify correct number of drops added
- Test in shaded area away from sunlight
- Ensure test tube was clean before testing
- Try fresh water sample
- If color is between standards, estimate value
Problem: Inconsistent Results
Solutions:
- Use same testing location each time
- Ensure consistent drop counting
- Mix thoroughly after each reagent addition
- Time exactly 3 minutes
- Check reagent expiration dates
- Clean test tube between tests
- Test multiple samples to verify
Problem: Phosphates Won't Come Down
Solutions:
- Verify phosphate remover dosage is adequate
- Run pump continuously during treatment
- Clean filter after phosphate remover application
- Identify and eliminate phosphate sources
- May need multiple phosphate remover treatments
- Consider partial drain and refill for extreme levels
- Test fill water for phosphates
Problem: Algae Despite Low Phosphates
Solutions:
- Test chlorine levels (maintain 1 to 3 ppm)
- Balance pH to 7.2 to 7.6
- Shock pool to kill existing algae
- Brush pool surfaces vigorously
- Clean filter thoroughly
- Add algaecide for additional protection
- Check for other water balance issues
Frequently Asked Questions
What is a safe phosphate level for my pool?
Ideally, phosphate levels should be below 500 ppb (parts per billion). Levels below 100 ppb are excellent. Above 500 ppb, algae growth becomes more likely and phosphate removal treatment is recommended.
How often should I test for phosphates?
Test monthly during swim season as part of regular maintenance. Test more frequently (weekly or bi weekly) if you have recurring algae problems, after heavy storms, or during phosphate removal treatment.
Can I swim immediately after testing?
Yes. Phosphate testing does not affect pool water chemistry or safety. The small amount of test water and reagents used has no impact on the pool.
Do phosphates harm swimmers?
No. Phosphates themselves are not harmful to swimmers. However, they promote algae growth, which can make water cloudy, slippery, and potentially harbor bacteria.
Will shocking my pool remove phosphates?
No. Shocking kills algae and bacteria but does not remove phosphates. You need a specific phosphate remover product to reduce phosphate levels.
How long do test kit reagents last?
Reagents typically last 1 to 2 years when stored properly in a cool, dry location. Always check expiration dates on bottles and replace expired reagents for accurate results.
Why are my phosphate levels high after rain?
Rain washes phosphates from surrounding areas into your pool, including fertilizers from lawns, pollen from trees, and organic debris. This is why testing after storms is important.
Can I use this test kit for spas?
Yes. The Taylor K-1106 works for both pools and spas. Follow the same testing procedure regardless of water body size.
What if my phosphate level exceeds 3000 ppb?
If phosphates exceed the test kit's 3000 ppb range, you have extremely high levels requiring aggressive treatment. Use phosphate remover at maximum dosage, clean filter frequently, and consider partial water replacement.
Do I still need chlorine if phosphates are low?
Yes. Low phosphates help prevent algae, but you still need chlorine (or another sanitizer) to kill bacteria and viruses. Phosphate control and sanitization work together for complete water quality.
Conclusion
The Taylor Technologies K-1106 Phosphate Test Kit provides accurate, professional grade testing for monitoring and controlling phosphate levels in your pool. By testing regularly, interpreting results correctly, and taking appropriate action to reduce elevated phosphate levels, you can prevent persistent algae problems and maintain crystal clear water with less chemical usage and fewer algae treatments.
Key Takeaways
- Test phosphates monthly or when algae problems occur
- Target phosphate level below 500 ppb
- Follow testing procedure exactly for accurate results
- Wait full 3 minutes for color development
- Use phosphate remover for levels above 500 ppb
- Prevent phosphate buildup through regular maintenance
- Record results to track trends over time
- Store reagents properly and check expiration dates
- Combine phosphate control with proper sanitization
- Test after storms and at season opening/closing
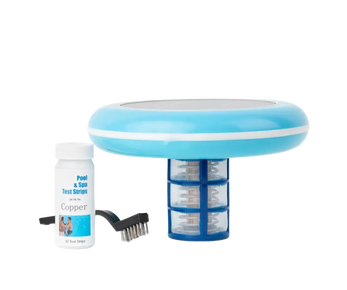
For comprehensive algae prevention that works alongside phosphate control, consider adding a Solar Pool Ionizer which releases copper and silver ions to naturally prevent algae growth while reducing chlorine needs by up to 85%, providing an additional layer of protection against algae even when phosphate levels fluctuate.