Table of Contents
- Introduction
- 1. Why Did Your Pool Turn Green?
- 2. Safety First: What to Do Before You Start
- 3. What You'll Need: Essential Pool Cleaning Supplies
- 4. Remove Large Debris First
- 5. Brush the Pool Thoroughly
- 6. Check and Adjust Your Water Chemistry
- 7. Shock the Pool (Superchlorination)
- 8. Let the Filter Run Continuously
- 9. Add an Algaecide for Long-Term Protection
- 10. Vacuum to Waste
- 11. Add Clarifier (If Needed)
- 12. Final Water Chemistry Adjustment
- 13. Daily and Weekly Maintenance Tips
- 14. Should You Drain a Green Pool?
- 15. Conclusion: Clean Pool, Happy Swimmer
Introduction
A green swimming pool isn't just an eyesore, it's a sign of an unhealthy pool environment that can harbor bacteria, breed algae, and cause potential health risks for swimmers. If you've walked outside only to find your pool water has turned a murky, swamp-like green, you're not alone. It's one of the most common and frustrating problems pool owners face, especially during the warmer months when conditions are perfect for algae to thrive.
Whether you're dealing with a slight discoloration or a full-blown pea-soup catastrophe, don't panic. The good news? With the right process, proper tools, and a little elbow grease, you can restore your pool to a pristine blue in just a few days, without draining it.
This comprehensive guide will walk you through how to clean a green pool step-by-step, from understanding what causes algae blooms to choosing the right shock treatment and balancing your water chemistry. You'll also learn essential tips for preventing future outbreaks and maintaining crystal-clear water all season long. Whether you're a first-time pool owner or a seasoned pro, this guide has everything you need to reclaim your backyard oasis. Let's dive in!
1. Why Did Your Pool Turn Green?
Before you jump into scrubbing and shocking your pool, it's essential to understand why your pool water turned green in the first place. The short and most common answer? Algae.
Algae are microscopic, plant-like organisms that naturally exist in the environment. When your pool water lacks the proper chemical balance, particularly when chlorine levels drop too low, these organisms can multiply rapidly, leading to what is commonly referred to as a green pool.
Common Causes of a Green Pool
Here are the most likely culprits:
- Low Chlorine Levels: Chlorine is your pool's first line of defense against algae and bacteria. If the free chlorine level dips below 1 ppm (parts per million), algae can begin to grow unchecked.
- Poor Circulation or Filtration: A malfunctioning or underperforming pump and filter system allows dead zones to form in the water where algae thrive.
- Neglected Maintenance: Skipping a few days of brushing, vacuuming, or water testing can give algae the foothold it needs.
- High Phosphate or Nitrate Levels: These substances are essentially food for algae. They come from organic matter like leaves, pollen, bird droppings, and even some pool chemicals.
- Sunlight Exposure: Direct sunlight can degrade chlorine, especially if the pool lacks adequate stabilizer (cyanuric acid). Warm water combined with sunlight creates an ideal breeding ground for algae.
- Contamination from Swimmers: Sunscreens, body oils, sweat, and dirt can introduce nutrients that help algae bloom.
Types of Algae
- Green Algae: The most common type. It floats freely or sticks to walls and turns the entire pool green.
- Yellow Algae (Mustard Algae): Clings to shady corners and walls. It's more chlorine-resistant and harder to remove.
- Black Algae: The most stubborn type. It grows in concrete and plaster and has deep roots that require aggressive treatment.
Prevention Tips
- Preventing a green pool starts with consistency:
- Test and maintain free chlorine at 1–3 ppm daily.
- Monitor pH, total alkalinity, and cyanuric acid levels weekly.
- Brush and vacuum the pool regularly, even if it looks clean.
- Run the pump for at least 8–12 hours per day.
- Clean the skimmer and pump baskets weekly.
- Use phosphate removers if levels are high.
Catching issues early is your best defense. If your pool starts to look dull or slightly cloudy, test the water immediately and take corrective action.
2. Safety First: What to Do Before You Start
Before you begin the physical work of restoring your pool, it's important to ensure a safe environment for handling pool chemicals and performing manual cleaning tasks. Cleaning a green pool involves potent oxidizers, algaecides, and other sanitizers that can be hazardous if not used correctly.
Prepare the Area
- Remove all pool toys, floats, and accessories.
- Keep pets and children away from the pool and chemical storage areas during the entire cleaning process.
- Have a designated clean workspace for preparing and mixing chemicals, never near the pool edge or water.
Personal Protective Gear (PPE)
Pool chemicals can irritate the skin, eyes, and respiratory tract. Protect yourself by wearing:
- Rubber gloves: Protect your hands from caustic substances like chlorine or muriatic acid.
- Safety goggles or a face shield: Prevent chemical splashes from reaching your eyes.
- A breathing mask or respirator: Especially if you're working with powdered shock or muriatic acid in an enclosed area.
Safe Chemical Handling Practices
- Always read product labels and safety instructions before using.
- Add chemicals to water, never the other way around.
- Store chemicals separately and securely, away from heat and sunlight.
- Never mix different types of chlorine (e.g., dichlor and Cal-Hypo), as this can cause dangerous reactions or even explosions.
- Avoid handling chemicals in windy conditions to reduce the risk of inhalation or eye contact.
Emergency Readiness
- Keep clean water and a first-aid kit nearby in case of spills or splashes.
- Know the location of your local poison control center number.
- If you spill a chemical, follow cleanup instructions from the manufacturer, never hose it into drains or grass.
Taking a few minutes to ensure your space is safe can prevent serious accidents and set you up for a successful green pool cleanup.

3. What You'll Need: Essential Pool Cleaning Supplies
Before you tackle a green pool, it's important to assemble everything you'll need in one place. Having your tools and chemicals on hand before you begin will save you time, frustration, and repeated trips to the store. Think of it as preparing your poolside "toolkit."
Here's a complete checklist of what you'll need to bring your green pool back to life:
Chemicals
-
Calcium Hypochlorite (Cal-Hypo) Shock Treatment
This is your heavy hitter. Cal-Hypo is a fast-dissolving, high-concentration chlorine that kills algae quickly and effectively. Use a granular or pre-dissolved version and avoid combining with other chemicals. -
Algaecide
Look for Polyquat 60 (non-metallic and non-foaming) or a copper-based algaecide for stubborn green algae. These agents inhibit algae regrowth after shock treatment does the initial kill. -
Pool Water Clarifier
Once the algae are dead, tiny particles may cloud your water. A clarifier helps bind these particles into larger clusters so your filter can remove them more efficiently. -
pH and Alkalinity Adjusters
- Soda ash to raise pH
- Muriatic acid or sodium bisulfate to lower pH
- Baking soda to raise alkalinity
You'll need these to bring your water back into proper chemical balance after shocking.
-
Calcium Hardness Increaser
If your pool has low calcium levels, it can lead to equipment corrosion or etching of the surface. Use calcium chloride to increase hardness. -
Stabilizer (Cyanuric Acid)
If your chlorine keeps vanishing quickly, low stabilizer levels may be the cause. Cyanuric acid helps maintain effective chlorine levels under UV exposure.
Equipment
-
Telescopic Pole
A versatile tool for attaching brushes, skimmers, or vacuums, essential for reaching every corner of the pool. -
Pool Brush
Choose the right type for your pool surface:- Stainless steel for concrete or gunite pools (tough on algae)
- Nylon brushes for vinyl or fiberglass pools (gentle on surfaces)
-
Manual Pool Vacuum
Offers greater control for deep cleans, especially important when targeting dead algae and debris after shock treatment. If available, robotic vacuums are effective but may not handle large algae outbreaks. -
Leaf Rake or Skimmer Net
Use a heavy-duty mesh rake for removing large debris. A skimmer net is helpful for daily maintenance and floating debris. -
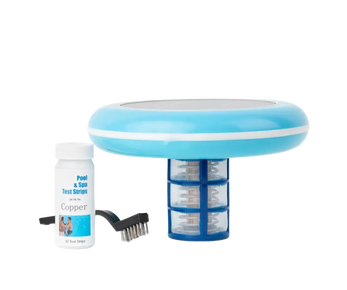
Test Kit or Test Strips
A liquid test kit offers greater accuracy, especially when balancing pH and chlorine after shock. However, test strips are convenient for quick checks. -
Filter Cleaner or Backwash Hose
After heavy filtration, you'll need to clean your cartridge or backwash your sand/DE filter. Stock up on filter cleaner to help maintain flow and performance.
Pro Tip: Always keep backup supplies of shock and test strips on hand. Algae outbreaks can happen quickly, and fast response time is key.
4. Remove Large Debris First
Before you even think about tossing in chemicals, your first step should always be physical debris removal. Organic matter like leaves, bugs, and dirt not only looks bad, it actually consumes chlorine, making your shock treatment far less effective. Worse, it can reintroduce phosphates and nitrates into your water, feeding another algae bloom.
Step-by-Step Debris Removal Process
-
Use a Leaf Rake or Skimmer Net
Start by skimming the surface for floating debris. Then switch to a deep-leaf rake to scoop leaves and twigs from the pool bottom. Use slow, overlapping passes to avoid stirring up debris. -
Don't Forget Corners and Steps
Debris tends to settle in hard-to-reach places like stairs, ladders, and corners. Pay extra attention to these areas. -
Remove Pool Toys and Accessories
Algae can cling to pool noodles, floats, and toys. Remove and disinfect these items separately with a mild bleach solution. -
Assess Debris Levels
If you cannot see the bottom of the pool and the water is extremely dark, it may be more efficient to partially drain the pool and refill it before applying chemicals. -
Clear the Skimmer and Pump Baskets
Clogged baskets reduce circulation, which hampers chemical distribution and slows algae removal.
Important Note: Do not use your pool vacuum yet! Large debris can clog the vacuum and filter system. Remove as much manually as possible first.
Why This Step Matters
Starting with debris removal isn't just a housekeeping tip, it's a critical chemical efficiency strategy. Chlorine works best when it can directly contact algae. Large debris blocks that contact, making the process longer and more expensive.
5. Brush the Pool Thoroughly
Once the visible debris is gone and before shocking the pool, it's time to brush the walls and floor. This is a step that many pool owners either overlook or rush through, but don't make that mistake. Brushing is critical for dislodging algae that clings to surfaces and hide in crevices.
Why Brushing Matters
Algae can form biofilms, a slimy protective layer that shields it from chlorine and other sanitizers. If you skip brushing, even the most powerful shock treatment might only kill free-floating algae, leaving behind colonies stuck to your pool surfaces.
How to Brush Effectively
- Start from the shallow end and work your way to the deep end.
- Pay special attention to steps, ladders, corners, behind handrails, light niches, and return jets. These are algae-prone zones.
- Use slow, overlapping strokes to ensure full coverage.
- Don't forget to brush vertically and horizontally on walls and at the waterline.
- If algae is thick, you may need to brush multiple times over several days.
Choosing the Right Brush
- Stainless Steel Bristles: Best for concrete, gunite, and plaster pools. These offer the strength to scrub stubborn algae.
- Nylon Bristles: Ideal for fiberglass or vinyl-lined pools where delicate surfaces could be damaged by harsher brushes.
- Combo Bristles: Some brushes combine stainless steel and nylon for versatility.
After brushing, the pool may appear even cloudier. This is a good sign, it means you've broken the algae loose and it's now suspended in the water where chemicals and the filter can deal with it effectively.

6. Check and Adjust Your Water Chemistry
Before shocking the pool, it's absolutely essential to test and balance the water chemistry. If your water is out of range, especially the pH level, your chlorine will be far less effective, which means wasted time and chemicals.
Key Water Parameters to Test
Use a reliable liquid test kit or high-quality test strips to check the following:
-
pH: Target range is 7.2 to 7.6. A pH outside this range affects chlorine efficacy and may lead to scaling or corrosion.
- If pH is too high (above 7.8): Add muriatic acid or sodium bisulfate.
- If pH is too low (below 7.0): Add soda ash (sodium carbonate).
-
Total Alkalinity: Should be between 80 and 120 ppm. Alkalinity helps buffer pH changes and ensures stability.
- To increase alkalinity, add baking soda.
- To decrease alkalinity, use acid treatments (carefully).
-
Calcium Hardness: Ideal range is 200 to 400 ppm. Low levels can lead to surface etching; high levels may cause scaling.
- Adjust using calcium chloride if needed.
-
Cyanuric Acid (Stabilizer): Should be in the 30–50 ppm range. Too little, and UV rays degrade chlorine quickly; too much, and chlorine becomes less effective.
- Add stabilizer as needed, but avoid going above 60 ppm unless you're managing a saltwater pool.
Testing and Adjusting Strategy
- Test in the late afternoon or early evening when sunlight is reduced.
- Always adjust pH and alkalinity before shocking the pool.
- After adding chemicals, wait 4–6 hours, then retest before moving on.
Proper water balance ensures that when you shock the pool, your chlorine works at full strength, killing algae and oxidizing contaminants efficiently.
7. Shock the Pool (Superchlorination)
Now that the water is balanced and algae is floating free from pool surfaces, it's time for the most crucial part of the green pool recovery process: superchlorination, commonly known as shocking the pool.
What Is Pool Shock?
Pool shock is a high dose of chlorine or oxidizer that rapidly eliminates algae, bacteria, and organic contaminants. When used properly, it can turn your green pool into a clear, swim-ready sanctuary within days.
Types of Pool Shock
- Calcium Hypochlorite (Cal-Hypo): Strong and fast-acting; most effective for severe algae blooms.
- Sodium Dichlor: More stable, but slower-acting. Better for routine maintenance or mild outbreaks.
- Non-Chlorine Shock (Potassium Monopersulfate): Great for oxidizing organic material but not ideal for killing algae.
How Much Shock to Use
Dosing depends on how severe the algae bloom is:
- Light Green Water: Use 1 lb of Cal-Hypo per 10,000 gallons of pool water.
- Medium Green Water: Use 2 lbs per 10,000 gallons.
- Dark Green or Black Water: Use 3+ lbs per 10,000 gallons, possibly in multiple rounds.
How to Apply Shock Properly
- Shock at dusk or nighttime to prevent UV degradation.
- If using granular shock, pre-dissolve it in a bucket of water before adding to the pool.
- Broadcast the solution evenly across the pool surface, focusing on areas with visible algae.
- Keep the filter off for 30 minutes, then run it continuously for at least 24–48 hours.
- Keep the pool uncovered to allow organic compounds and chloramines to off-gas.
What to Expect
After shocking, your pool may go through some color changes:
- Green to cloudy blue: Dead algae suspended in the water
- Temporary dark or murky tint: As contaminants are oxidized
- Foam or bubbles: If organic contaminants were high
This is all normal. Let your filter and chemicals do the heavy lifting while you monitor the progress.
8. Let the Filter Run Continuously
Once the shock treatment has been applied, the next critical step is to run your pool filter non-stop until the water clears. This may take anywhere from 24 hours to a full week, depending on how severe the algae bloom was and the size and condition of your pool's filtration system.
Why Continuous Filtration Is Crucial
After shocking the pool, millions of dead algae particles, bacteria, and organic debris are suspended in the water. Your filter is the only way to physically remove these contaminants and restore clarity. If you stop filtration too soon, the dead algae can settle back onto surfaces, restart the bloom, or clog your system.
Tips for Effective Pool Filtration
-
Run the Filter 24/7
Continuous filtration accelerates cleanup and ensures that every particle is eventually removed from circulation. -
Backwash Regularly (for Sand or DE Filters)
If you have a sand or diatomaceous earth (DE) filter, backwash it daily or when the pressure gauge rises by 8–10 psi above the normal operating range. This ensures water flow isn't restricted. -
Clean Cartridge Filters Every 24 Hours
Cartridge filters should be removed and hosed down daily during the cleanup phase. Consider using a filter cleaner spray for a deeper cleanse if buildup is heavy. -
Use Pool Water Clarifier
Clarifiers bind fine particles (like dead algae) into larger clusters that the filter can trap more easily. Add it only after shocking and follow the product's dosage instructions carefully. -
Monitor Filter Pressure
A sudden rise in pressure indicates that the filter is becoming clogged and needs to be cleaned or backwashed. -
Don't Cover the Pool During Filtration
Leave the pool uncovered to allow sunlight to assist in oxidizing contaminants and to prevent heat and moisture buildup under the cover.
Maintaining strong circulation is the backbone of cleaning a green pool. Until the water is crystal clear and you can see the bottom, do not shut off your filtration system.
9. Add an Algaecide for Long-Term Protection
Once your pool water is clear and you've successfully shocked and filtered out the dead algae, it's time to add algaecide to your pool. This step isn't about killing active algae, that job is already done. Algaecide serves as a preventative measure to keep algae from returning.
When and Why to Use Algaecide
- Use algaecide after shocking and clarifying to maintain a clean pool environment.
- It acts as a secondary layer of protection, especially during hot weather or heavy swimmer loads when chlorine levels can fluctuate.
- It's also effective during weekly maintenance routines to reduce the likelihood of new growth.
Types of Algaecide to Consider
-
Polyquat 60 (Polyquaternary Ammonium)
This is a non-metallic, non-foaming algaecide that's safe for all pool surfaces. It's preferred for its effectiveness without risk of staining or irritating swimmers' skin and eyes. -
Copper-Based Algaecides
These are highly effective, especially against stubborn or recurring algae types. However, they can cause staining if used in excess and may require the addition of a metal sequestrant to prevent scale buildup.
Application Tips
- Never add algaecide at the same time as shock treatment. High chlorine levels can neutralize the algaecide, rendering it ineffective. Wait until chlorine levels drop below 5 ppm.
- Add algaecide with the filter running to ensure even distribution throughout the pool.
- Follow the manufacturer's instructions for dosage. Overuse can lead to foam formation or staining.
By including algaecide in your recovery and regular maintenance routine, you're adding a protective barrier that keeps future blooms at bay, especially in high-risk environments like pools surrounded by vegetation or subject to heavy rain and wind exposure.

10. Vacuum to Waste
Even with continuous filtration, some debris will settle on the pool floor, especially dead algae, dirt, and residual shock particles. To remove this and avoid recycling it through your filter, it's best to vacuum to waste.
What Is "Vacuum to Waste"?
Vacuuming to waste means you bypass the pool filter entirely and send the vacuumed water directly out of the pool via the waste line or backwash hose. This technique is particularly effective when cleaning up large volumes of algae or sediment, as it prevents clogging your filter.
How to Vacuum to Waste Properly
-
Set the Multiport Valve to "Waste."
This setting is available on most sand and DE filters. It sends water straight out of the backwash line instead of filtering it. -
Attach a Manual Vacuum Head to the Telescopic Pole
Connect it to a vacuum hose and submerge it to eliminate air. Attach the other end of the hose to the skimmer line, using a vacuum plate if needed. -
Vacuum Slowly and Methodically
Move slowly across the pool floor in overlapping lines. Rushing can stir up debris, making it harder to remove. -
Watch the Water Level
Since vacuuming to waste drains water, monitor the pool's water level and pause to refill if it drops below the skimmer line. -
Repeat if Necessary
If the pool is still cloudy or there's visible debris after the first pass, wait for it to resettle and vacuum again. -
Avoid Automatic Pool Cleaners at This Stage
Manual vacuums offer more control and are more effective at removing silt and fine sediment. Robotic cleaners or suction-side cleaners may stir up algae or bypass fine debris.
Pro Tip: If your filter does not have a "waste" setting, you may need to manually drain water while vacuuming by using a submersible pump in conjunction with manual cleaning.
Vacuuming to waste is often the final cleanup step that turns a "mostly clear" pool into a truly crystal-clear oasis. It's the polish that completes the algae removal process.
11. Add Clarifier (If Needed)
Even after shocking, brushing, filtering, and vacuuming, your pool water may still appear cloudy or slightly green. This is especially common after severe algae blooms where millions of microscopic particles remain suspended in the water. If you've done everything else and still can't achieve perfect clarity, a pool water clarifier can help bring your water to that final, crystal-clear finish.
What Does a Clarifier Do?
Clarifiers work by coagulating tiny particles, such as dead algae, oils, dust, and dirt, that are too small to be captured by your pool's filter. Once bound together into larger clumps, these particles are easily removed through filtration or vacuuming.
How to Use a Clarifier
-
Choose the Right Product
Use a clarifier specifically designed for swimming pools. Avoid flocculants unless you're prepared to vacuum to waste, as flocculants drop particles to the pool floor instead of letting the filter capture them. -
Follow Dosage Instructions Carefully
Overusing clarifier can cause the water to become more cloudy. Always refer to the manufacturer's label for the appropriate dose based on your pool's volume. -
Run the Filter Continuously for 12–24 Hours
Keep the pump running without interruption during this period to allow the filter to remove clumped particles effectively. -
Vacuum After Treatment
Once clarity begins to improve, manually vacuum the pool again to remove any remaining sediment that has settled to the bottom.
Additional Clarifier Tips
- Multiple applications may be necessary depending on the extent of cloudiness.
- Avoid swimming during clarifier treatment to allow proper chemical action.
- Do not combine clarifier use with other chemical applications unless specifically recommended.
Adding a clarifier is often the finishing touch that makes a freshly cleaned pool look flawless.
12. Final Water Chemistry Adjustment
With the algae gone and the water clear, your next step is to fine-tune the water chemistry. Even if you've already made preliminary adjustments, it's essential to retest and rebalance to ensure that all chemical levels fall within ideal ranges. This helps keep your pool safe, prevents future algae growth, and protects your pool surfaces and equipment.
Retest Your Water Parameters
After your pool water is clear and you've completed all major cleaning steps, it's time to retest and rebalance your water chemistry. This ensures your pool remains safe, comfortable, and resistant to future algae growth.
Use a reliable liquid test kit or a digital pool tester to check the following levels:
- Free Chlorine: Aim for 1 to 3 parts per million (ppm). This helps keep the water sanitized and free of harmful bacteria.
- pH: The ideal range is between 7.2 and 7.6. This keeps the water comfortable for swimmers and ensures your chlorine works effectively.
- Total Alkalinity: Should be between 80 and 120 ppm. This helps buffer the pH and keeps it from swinging too high or too low.
- Calcium Hardness: Target a range of 200 to 400 ppm. Proper calcium levels protect your pool surfaces and equipment from corrosion or scaling.
- Cyanuric Acid (CYA): Also known as stabilizer, should be between 30 and 50 ppm. This protects chlorine from being broken down too quickly by sunlight.
Once all these levels are within their ideal ranges, your pool is properly balanced and ready for regular use. Make water testing a weekly habit to maintain this healthy chemical balance going forward.
Maintaining proper balance helps avoid scale buildup, corrosion, and ineffective sanitization. Once everything is within range, your pool is not just clean, it's safe, stable, and ready for enjoyment.
13. Daily and Weekly Maintenance Tips
One of the best ways to keep your pool from turning green again is through consistent, ongoing maintenance. Once your water is clear, stay ahead of problems with a practical care routine.
Daily Maintenance Tasks
- Run the Filter: Operate your filter system for 8–12 hours each day to maintain proper circulation and prevent dead zones where algae can grow.
- Skim Debris: Use a leaf net or skimmer to remove bugs, leaves, and other floating matter that can clog filters or decompose into phosphates.
- Monitor Chlorine Levels: Use test strips to ensure free chlorine remains between 1–3 ppm.
Weekly Maintenance Routine
- Brush Pool Walls and Floors: Algae can start in hard-to-see areas. Brushing helps prevent buildup and ensures sanitizer penetrates every surface.
- Vacuum the Pool: Whether manual or robotic, regular vacuuming removes dirt and organic material that the filter may miss.
- Test and Balance Water Chemistry: Use a complete test kit to check chlorine, pH, alkalinity, and stabilizer levels. Make corrections as needed.
- Shock the Pool Lightly: A light shock treatment once a week helps eliminate invisible contaminants like sweat, sunscreen, and cosmetics.
Monthly Pool Care Essentials
- Deep Clean the Filter: Whether you have a sand, DE, or cartridge filter, a monthly deep clean improves efficiency and prolongs the life of your filtration system.
- Inspect Equipment: Check for leaks, low pressure, strange noises, or broken components.
- Look for Signs of Trouble: Cloudiness, scale buildup, and odd odors may signal an issue before it becomes a full-blown algae bloom.
The key to a clear and healthy pool isn’t complicated, it’s consistency. Create a pool maintenance checklist and set calendar reminders to build good habits.

14. Should You Drain a Green Pool?
While most green pools can be cleaned without draining, there are certain situations where draining all or part of your pool may be necessary.
When Draining May Be the Best Option
- You Can’t See the Bottom: If your pool water is so murky that the floor is invisible, it may be more efficient and cost-effective to drain and refill.
- Excessive Chlorine Demand: If your pool cannot hold chlorine despite repeated shock treatments, high organic load or TDS (Total Dissolved Solids) may be overwhelming the system.
- High Cyanuric Acid or Calcium Levels: When stabilizer or calcium is too high and causing problems, partial draining may be the only way to lower concentrations.
- Biohazard Contamination: If your pool has been contaminated with raw sewage, animal remains, or floodwater, full draining is often the safest course.
Precautions for Draining
- Always Consult a Pool Professional: Draining can cause structural damage, especially in fiberglass or vinyl pools, or lead to the pool “floating” if the groundwater level is high.
- Avoid Draining in Rainy or Wet Seasons: High groundwater can lift empty pools from the ground.
- Drain Partially If Possible: Removing 30–50% of the water and refilling with fresh water can often resolve issues without fully emptying the pool.
Draining should be viewed as a last resort, not a default solution. When used appropriately and safely, however, it can be a powerful tool for tackling extreme cases of pool contamination or chemical imbalance.
15. Conclusion: Clean Pool, Happy Swimmer
Cleaning a green pool may seem overwhelming at first, especially when you’re staring down a murky, algae-filled mess. But as you’ve now seen, transforming that swampy water into a sparkling blue oasis is entirely possible, and incredibly rewarding. With the right tools, a clear strategy, and a bit of patience, you can bring your pool back to life and create a safe, inviting space for family and friends to enjoy.
Every step in the process, from removing visible debris and brushing the pool walls, to adjusting chemical levels, shocking the water, and running your filter continuously, plays a critical role in reclaiming your pool from an algae invasion. Skipping steps or cutting corners only prolongs the recovery process. But when done correctly, this method not only cleans your pool but also fortifies it against future algae blooms.
Just as important as the cleanup is what you do afterward. A consistent maintenance routine is the real secret to keeping your pool crystal clear for the rest of the season. Simple actions like testing the water weekly, brushing the surfaces, and keeping the filter in good working order can prevent the same issues from recurring. Think of maintenance as the long-term investment that protects the hard work you’ve already put in.
Whether this was your first green pool cleanup or one of many, remember that knowledge and consistency are your best tools. Each time you tackle algae, you become more familiar with your pool’s behavior, the local environment, and how to stay ahead of potential problems. Over time, what once felt like a major project will become a manageable routine.
Keep the Conversation Going
Have questions about your specific pool setup? Need help selecting the right shock or algaecide? Or maybe you’ve discovered a unique tip that worked wonders for your own pool? We’d love to hear from you.
Leave a comment below, share your experience, or ask for advice, this blog is a resource for all pool owners, and your input helps others on their journey to crystal-clear water.
Here’s to stress-free swimming, sun-soaked weekends, and a pool that’s always ready when you are.
Happy cleaning, and even happier swimming!